 Cropped
Download
Try free
Blog /
A major upgrade to Cropped, with much more ahead
Cropped 0.3.52 is out, and it's a big update. Here's what's new:
- A redesigned Annotate, with one list of tools and the Inspector side by side
- Padding numbers on every side while you pick an area, with snaps to even padding
- Capture sounds you can choose, or turn off
- Video recipes that apply the same edit to many videos at once
- Names and descriptions for your files in the Drop Zone
If you already have Cropped, it updates itself. If not, the 14-day trial needs no signup or card.
#A redesigned Annotate
Annotate has one list of tools and their options on the left, and the Inspector for the selected mark on the right. Every tool shows its shortcut key, you can zoom and pan around a big screenshot, and a numbered step can carry a short label: press Return after placing a number, or double-click it, to type one. Pressing a tool key no longer makes an error beep. The Check button is now called Accessibility Check, and it catches light gray headlines it used to miss.
#Padding numbers while you pick an area
When you choose an area to capture, Cropped shows the gap on every side as a number on a dashed line, measured from what's inside the area to its edge. You can match the padding by eye, and when you let go near a match, it snaps so every side is even.
- Drag an area. The gap on every side shows as a number.
- Let go near a match, and the padding snaps so every side is even.
- Hold Option (Alt on Windows) to resize from the center, so the sides stay even.
- Hold Shift to keep the shape while you resize.
- On a short gap, the number moves beside its line so you still see the line.
Try it here. In Cropped it's in Settings › Capture (Preferences › Capture on Windows and Linux).
The numbers are in pixels, and the size of the whole area shows above it. Click a number to type the exact padding you want. Shift and Option work the same way when you crop a screenshot in Annotate, and the Studio's Crop editor shows the same padding numbers. The area picker works like this on Mac and Windows. On Linux, choosing an area uses your desktop's own screenshot tool.
#Make the numbers your own
The padding numbers are yours to style in Settings › Capture › Padding numbers (Preferences on Windows and Linux). Show them the whole time or only as a side snaps, pick pink, yellow, green, cyan, orange, white or any color you like for the numbers and the snap lines, and choose Small, Medium, Large or Extra large. The text on each number turns black or white by itself, so it stays easy to read. The settings under the demo above work the same way, so give them a try.
#Capture sounds
Pick Shutter, Pop, Chime, Classic or Off in Preferences › Capture, with a play button to hear each one. The sounds now play on Mac, Windows and Linux.
#Video recipes: the same edit on many videos
Save a recipe with your Jump Cuts, captions, shape and up to four export sizes, then run it on a whole batch of videos. Cropped listens to each video once, cuts and captions it, and either holds it for you to check or exports every size. Drop two or more videos on the Drop Zone to start one. Recipes come with Cropped Core; the Jump Cuts and Captions steps need Pro, like they do on a single video.
#Names and descriptions in the Drop Zone
Click a file's name in the Drop Zone to rename it (or press Enter or F2), and give captures a short description. With Pro you can turn on AI names in Preferences › AI tools and pick Gemini, Claude or OpenAI to suggest a name and description for each capture, including videos. Names and descriptions go along to your share links too, and a link you already sent picks up a new name when you change it.
#Also new
- Share link from anywhere. Make a share link straight from the Drop Zone or the Studio, and send a new version of a file to the same link.
- Picture or link after a capture. Cropped copies the picture unless you chose links, and you can switch after a capture.
- Connect your AI tools in one click. Preferences › AI tools has a Connect button for Claude Code, Claude Desktop, Codex and Cursor.
- 1, 2 and 5 fps exports and AI presets for recordings, so an AI tool can read a video as a handful of frames.
- GIF ➞ Arranged lays a GIF's or a video's frames out in one picture.
- iPhone video sound. Captions and Jump Cuts now read the sound in videos from iPhone 16 and later.
- The Drop Zone in your captures. With Show the Drop Zone on, screenshots and recordings keep it open.
- Shared videos at up to 5x. People watching your share links can speed up to 5x and see how much time it saves, and react with an emoji right on the timeline.
#A new look
You'll notice that things look a lot different. Cropped got a major upgrade, with much more ahead, starting with a new look for cropped.app and a calmer, cleaner experience in the app. Our new look and improved UX is all thanks to Jeff Black.
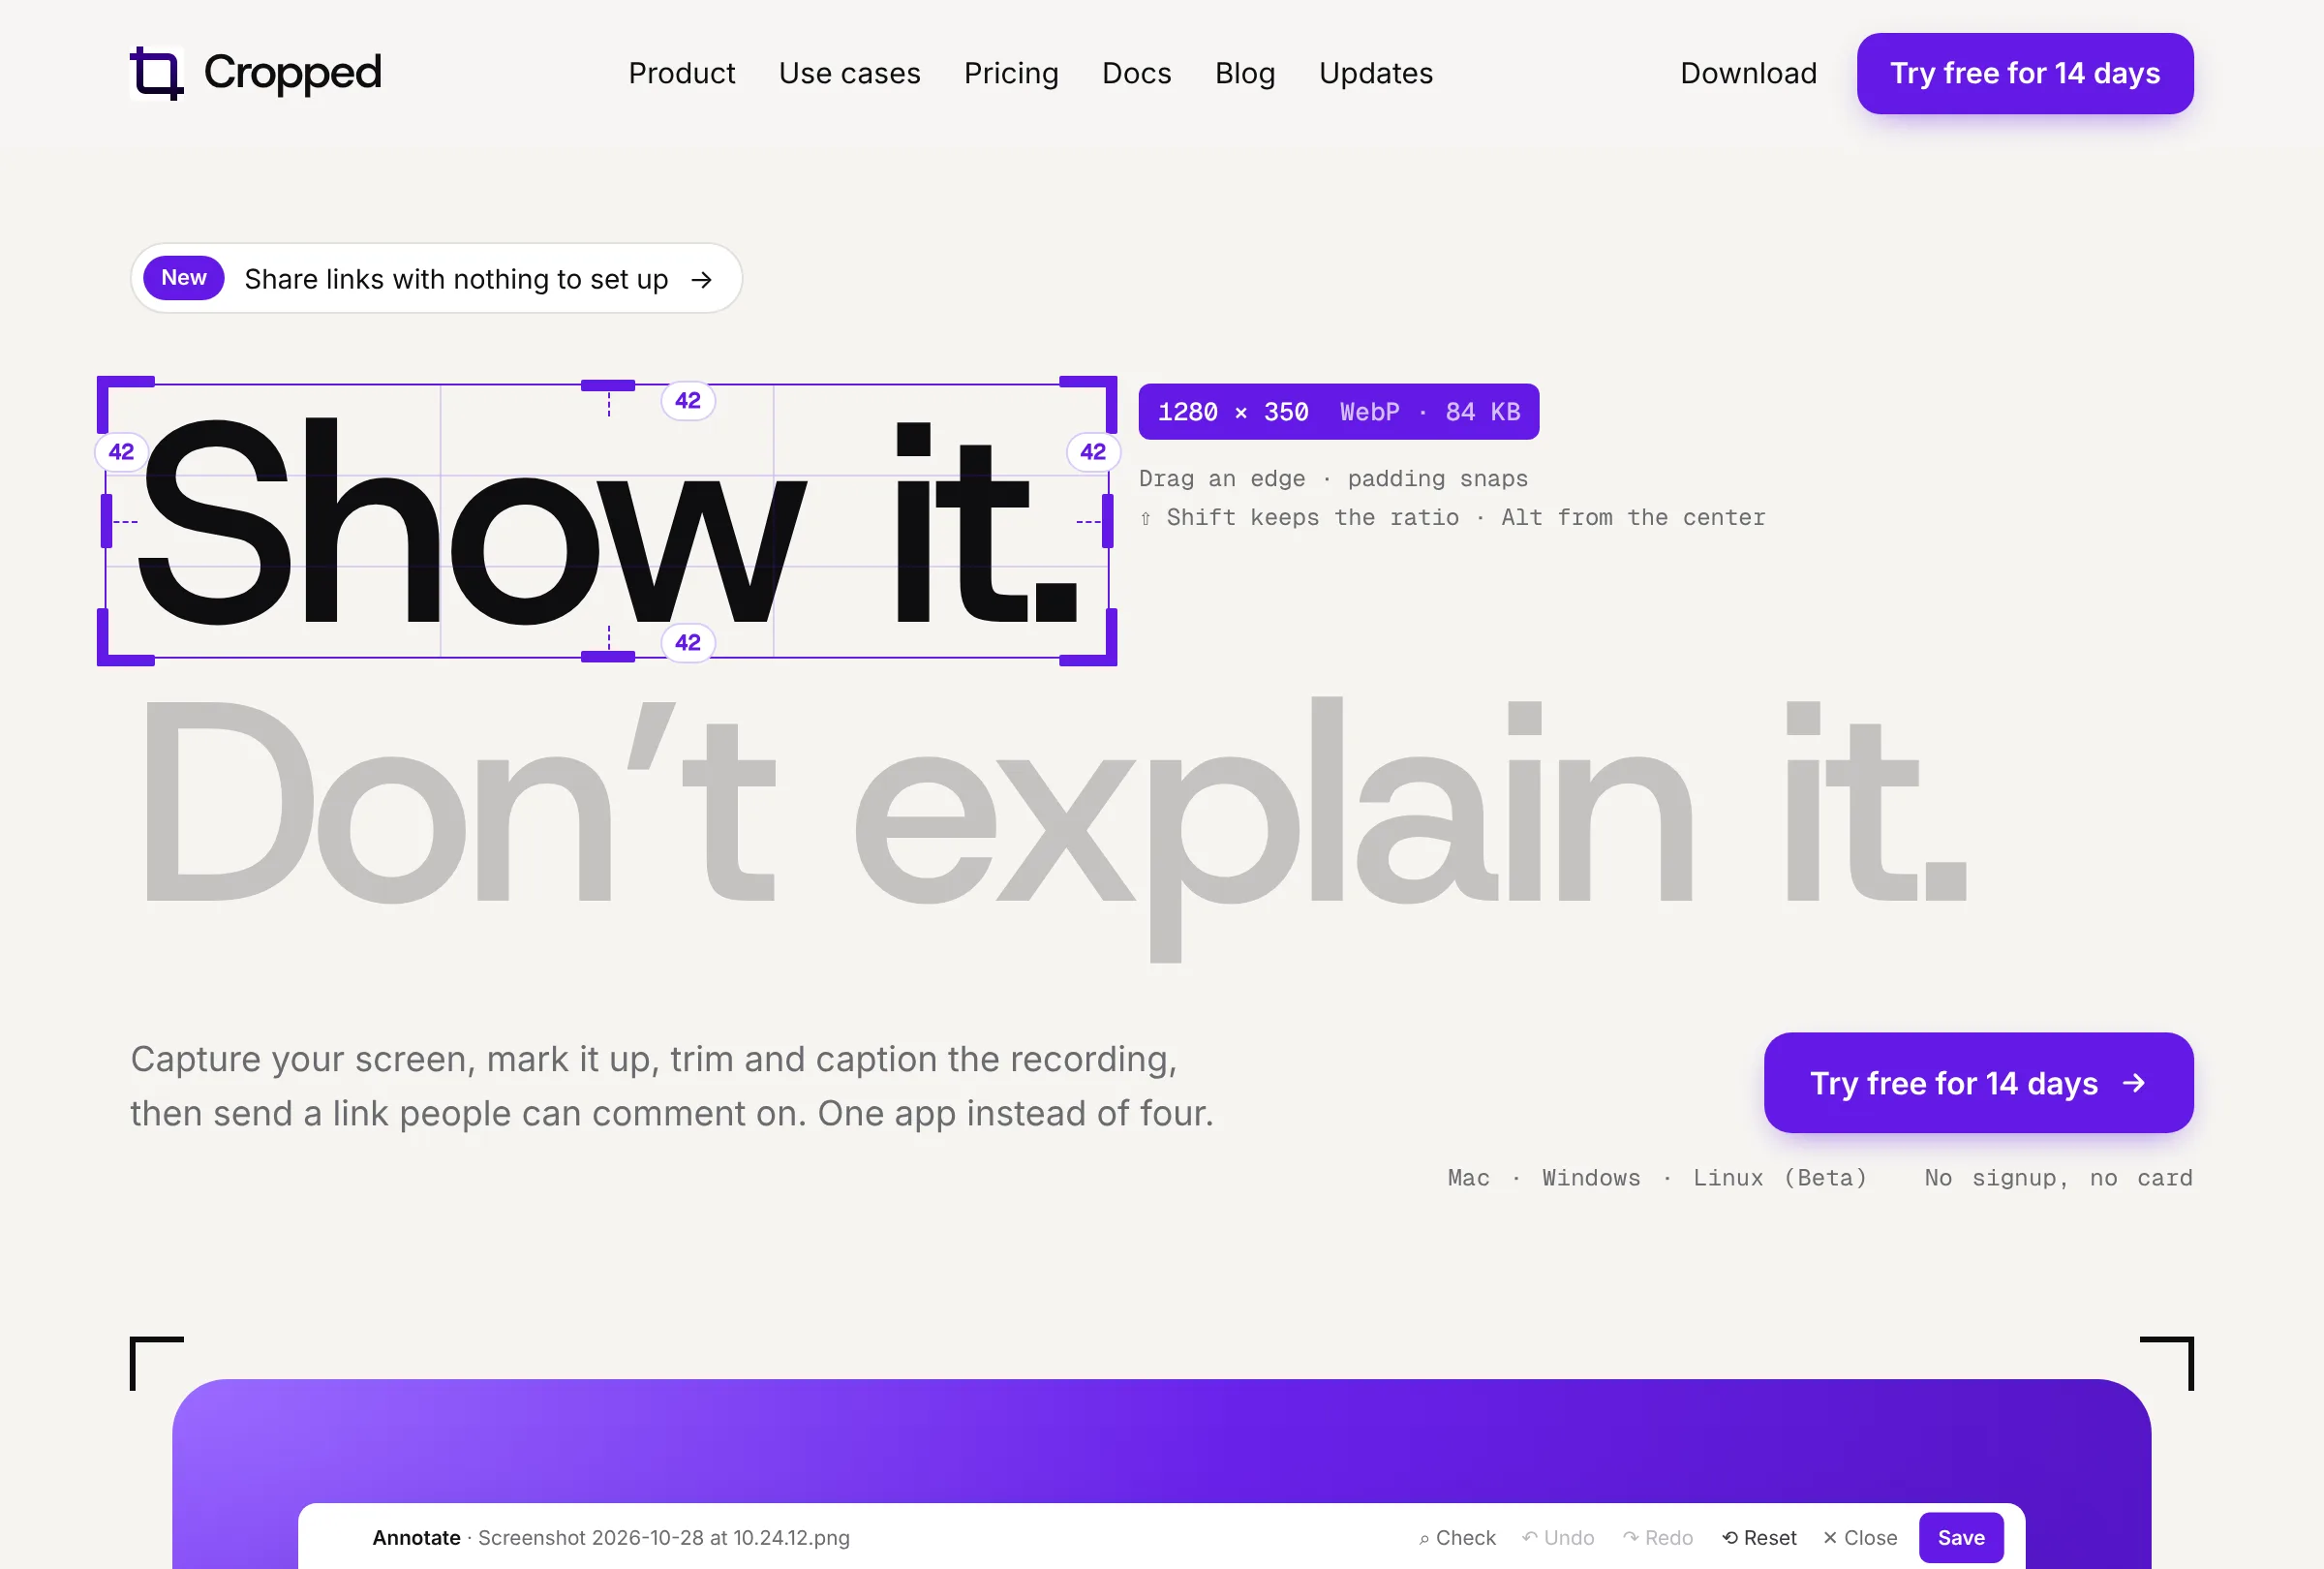
#The website
- Product replaces Features, with Mac, Windows and Linux cards that each have their own download button.
- Download shows the latest version, its notes and every earlier version in the new style.
- Developers explains share links with comments and to-do lists, the 1, 2 and 5 fps AI presets, and how Cropped works with your AI tools.
- Updates, Versions and Blog sit side by side as tabs, so switching between them doesn't move the page.
- On a phone, Who it's for is a slider you swipe, and the Optimize presets play through on the Drop Zone by themselves.
#Since the last round-up
- Copy link is instant. The link is on your clipboard straight away and the file uploads while you paste it. Turn on Copy a share link in Preferences › Capture to get one after every capture.
- Check for updates any time by clicking the version number at the bottom of the queue, and restart into the new version right there.
- Bug reports have their own tab in Preferences, and Your reports shows when each one was received and resolved.
- Keep editing while Optimize & Save runs, with a progress pill and a cancel button in the top bar.
This round-up covers Cropped 0.3.50 to 0.3.52. Every change is listed on Updates.
More from the blog
All posts-
A warm welcome to Jeff Black, our new Co-Founder
Jeff Black is joining Cropped as a Co-Founder. Jeff designed the new cropped.app and the cleaner look in the app, and there's much more ahead.
-
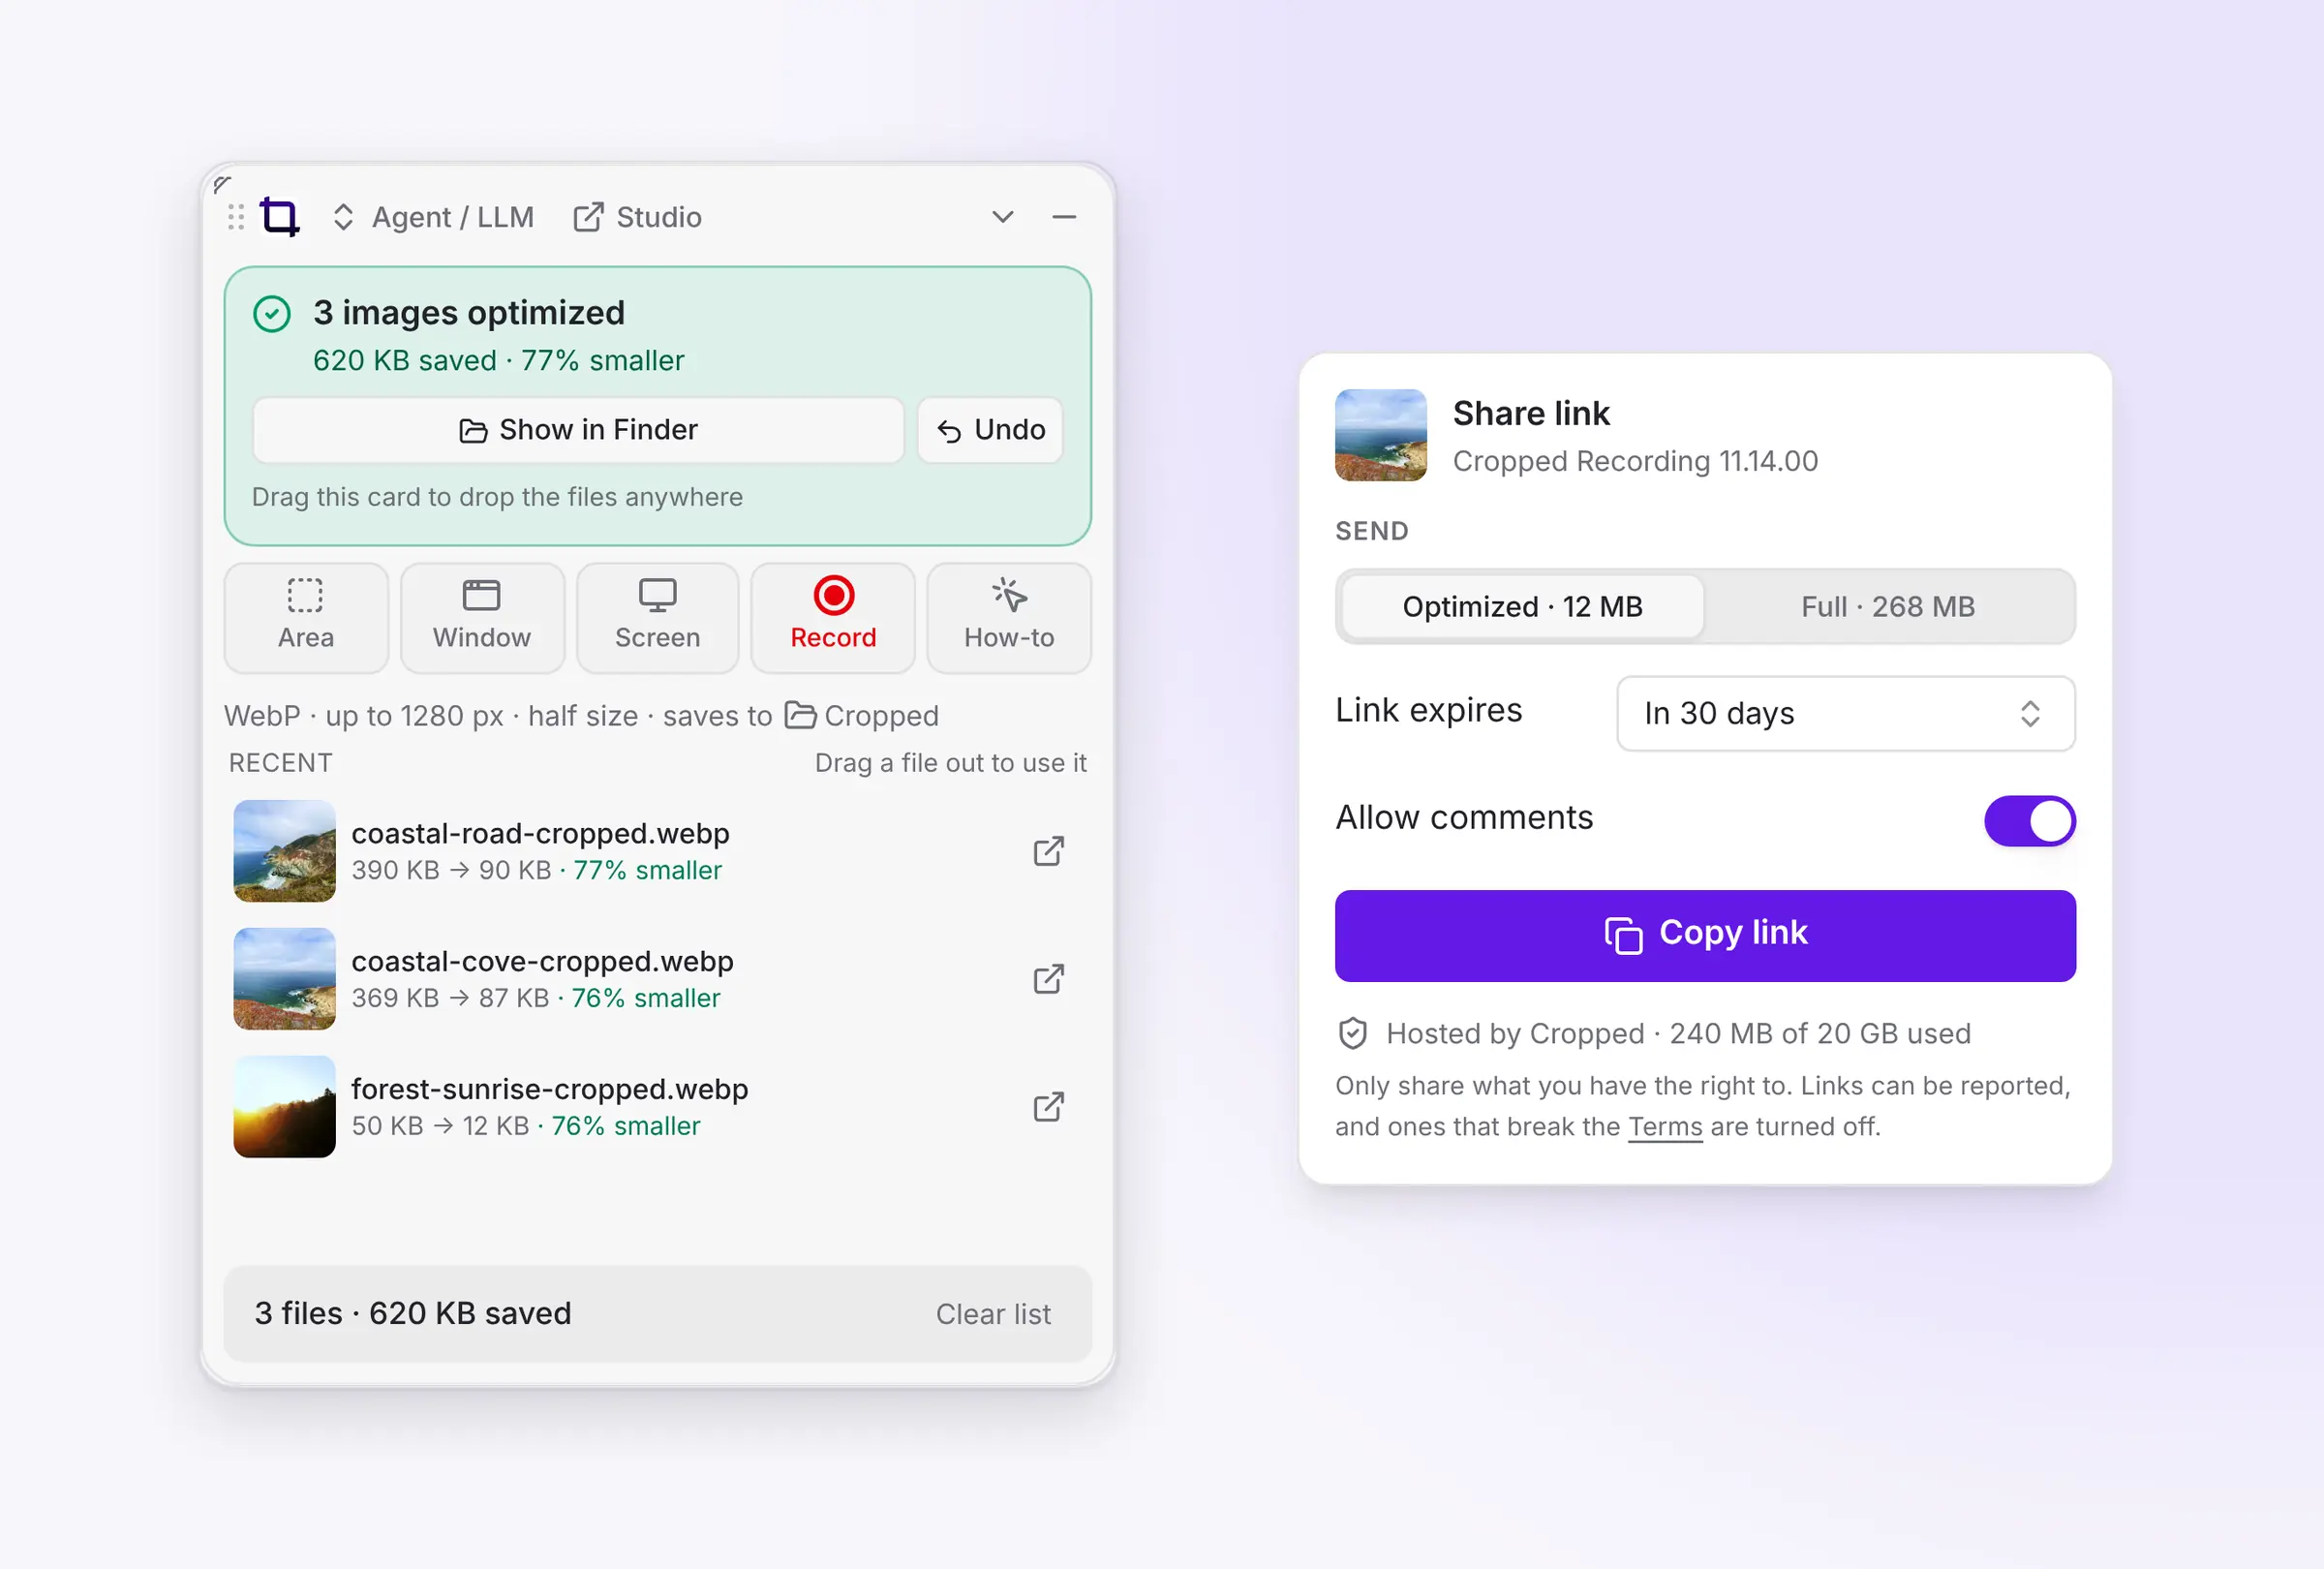 This week in Cropped: Share link, a simpler Drop Zone, an accessibility check and Intel Macs
Share any capture as a link people can comment on with nothing to set up, a simpler Drop Zone, one-file .cropped projects you can send, an accessibility check for screenshots, a cleaner Studio and Cropped on Intel Macs.
-
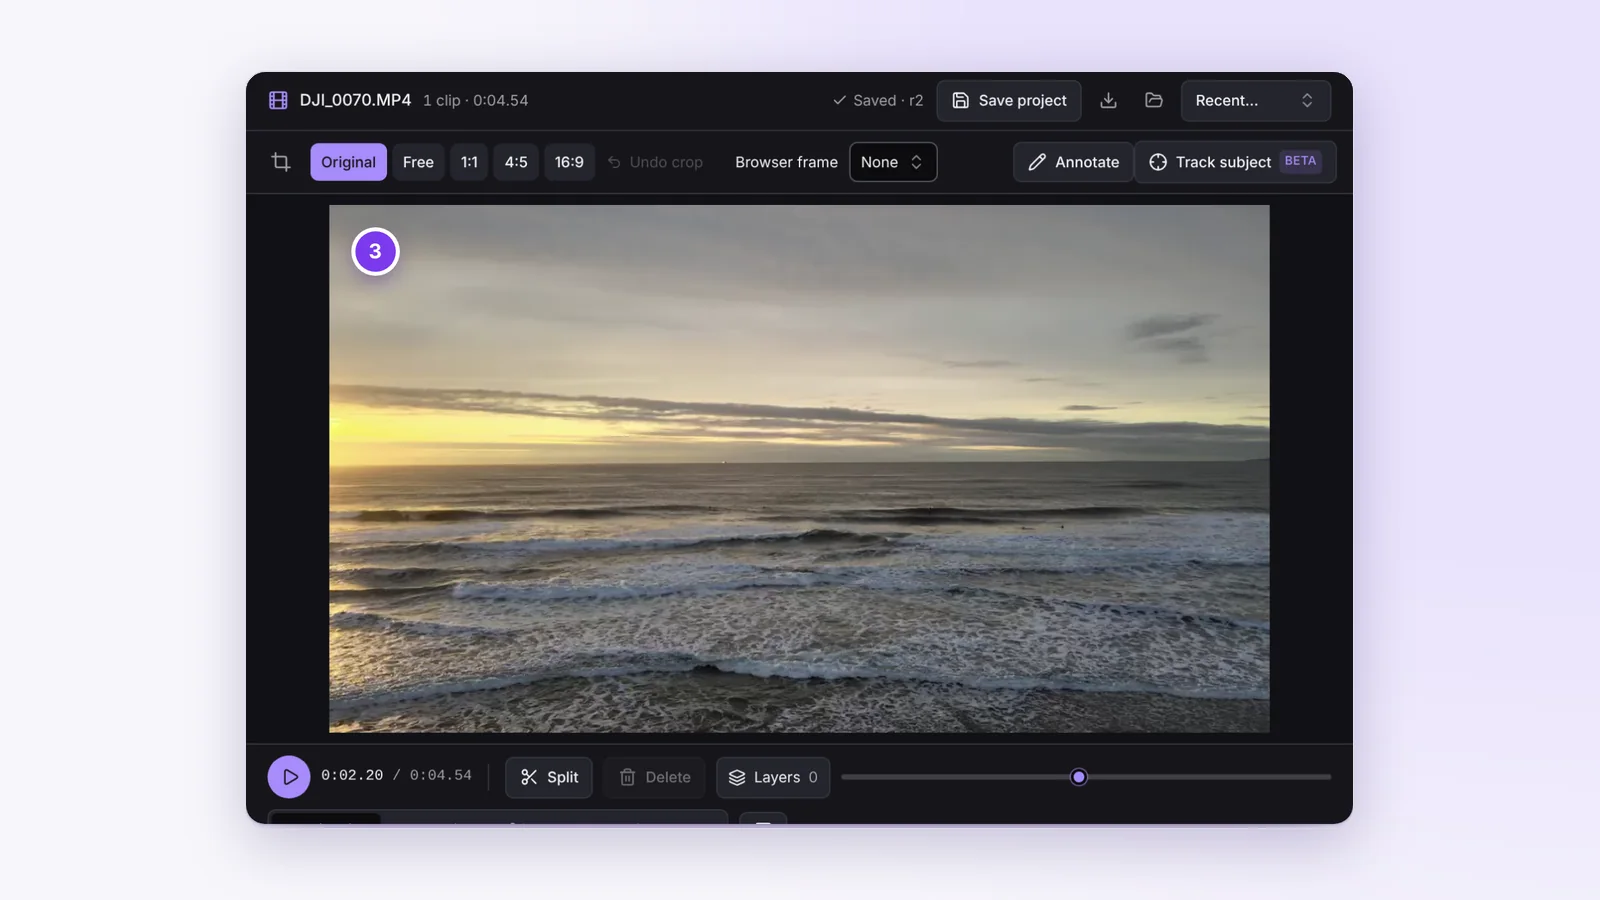 This week in Cropped: Jump Cuts, HDR video, smaller PDFs and several windows in one screenshot
Jump Cuts takes the pauses and retakes out of a talking video, captions now edit the video itself, HDR videos stay bright from import to export, the Drop Zone shrinks PDFs, and one capture can hold several windows.
-
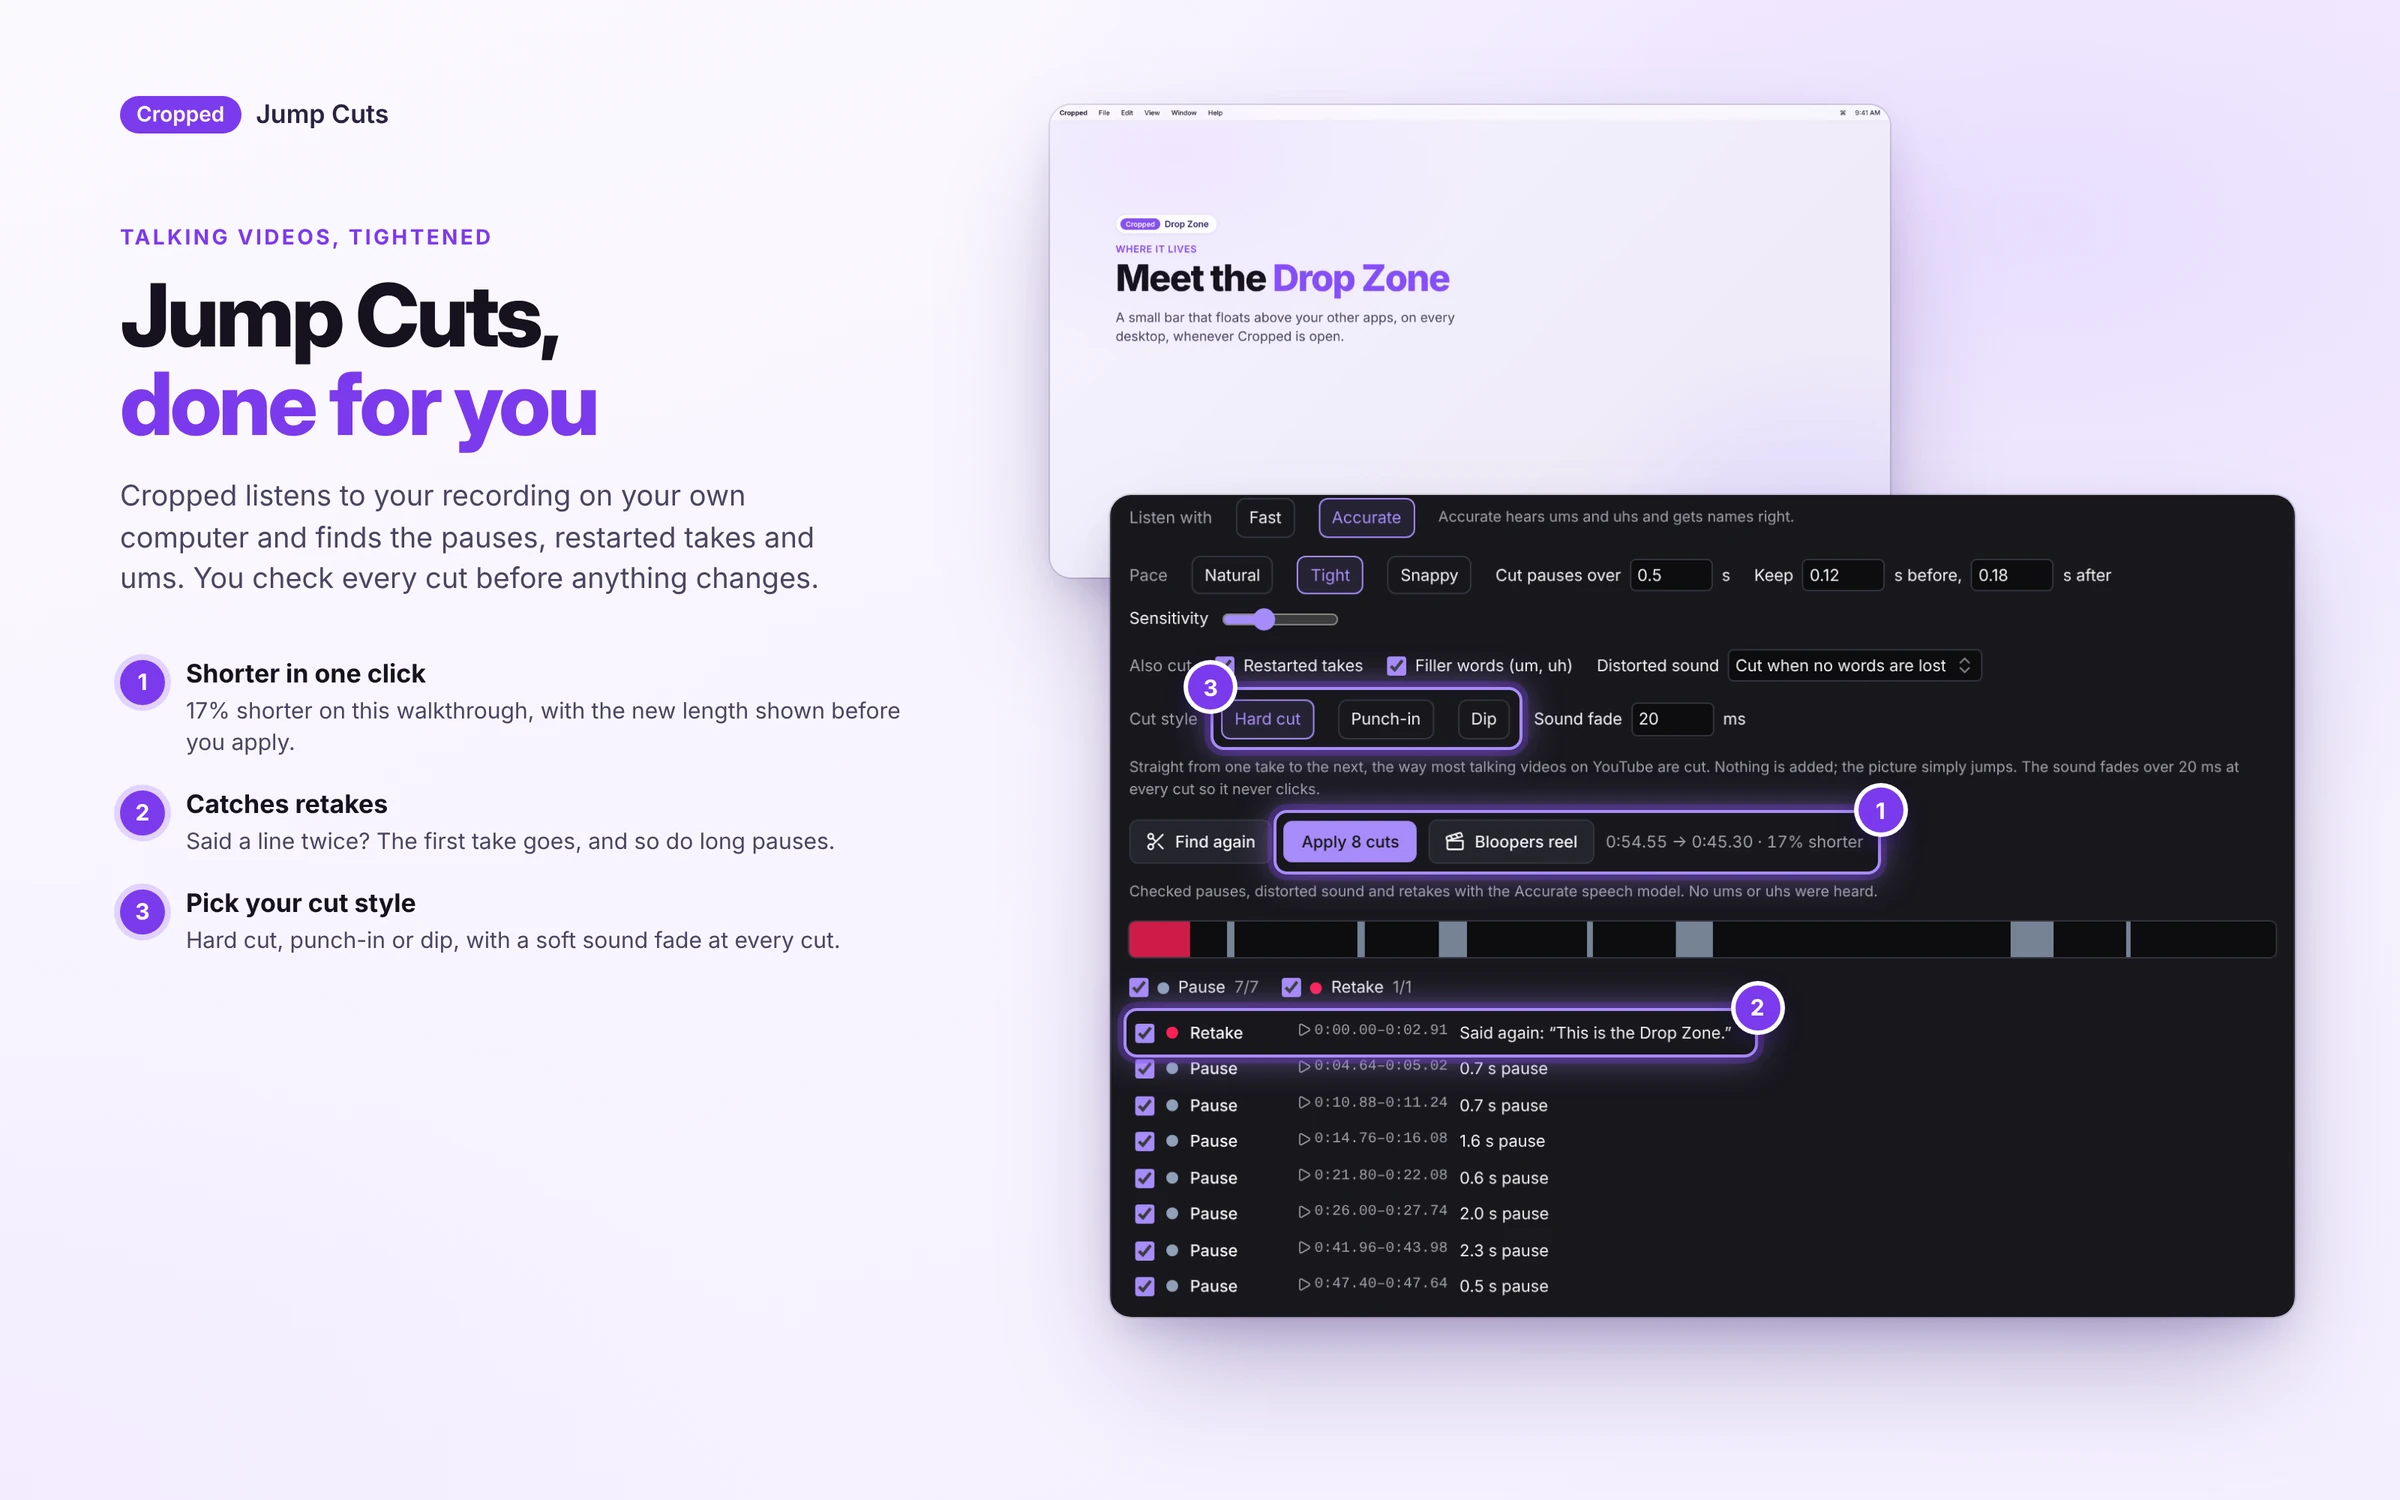 This week in Cropped: Jump Cuts, editing a video from its words, and Early Access pricing ends Friday
Jump Cuts takes the pauses, ums and retakes out of a talking video for you, captions now edit the video itself, and the Mac app installs like any other. Buy by Friday, October 23 at 11:59 pm PT to get the Early Access price and keep every Pro tool for life.