 Cropped
Help
Cropped
Help
Help / How to
Batch resize and compress a folder of images
The short answer: choose a preset in the Drop Zone's Settings, then drag the whole folder onto the Drop Zone. Cropped optimizes every image and video in it and saves the copies in Downloads/Cropped. Your originals are never touched.
Steps
- Click Settings in the Drop Zone and pick an image preset, such as Web (WebP, up to 1920 px) or Share (JPEG for apps that don't open WebP). Set a maximum width or height if you need one.
- Drag the folder, or a selection of files, onto the Drop Zone.
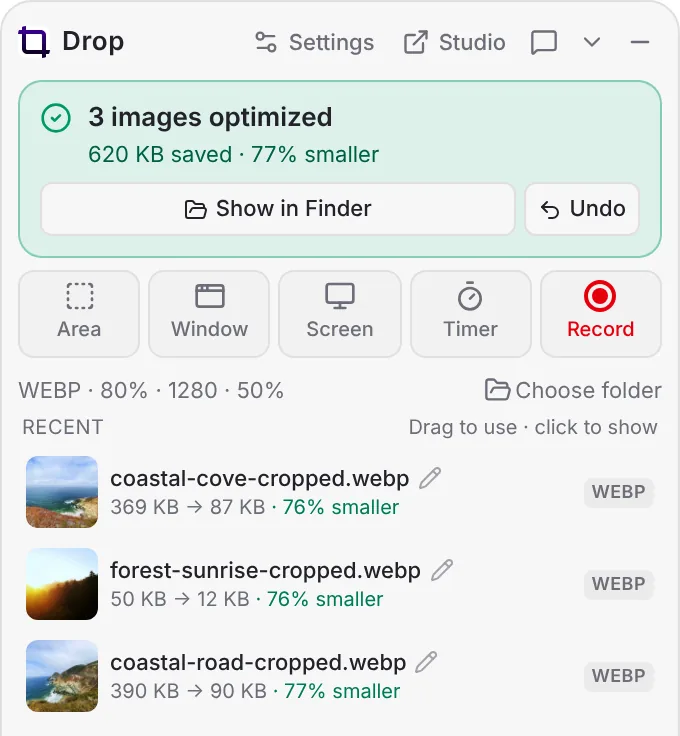
- Cropped shows progress, such as "Optimizing 2 of 5", then one card with the total saving.
- Drag the results into another app, click Show in Finder (Windows: Show in Explorer), or click Undo.
Do it automatically
Turn on Watch folder (auto-optimize) in Preferences › App and choose a folder, such as your screenshots or camera import folder. Every new image or video that lands there is optimized with your Drop Zone settings.
Need more control?
Drop the files on the Studio instead to adjust each one, pick several export sizes, or save a preset of your own. See Optimize and compress images and The Drop Zone.
Still stuck? Click the ? button at the bottom left of the Cropped Studio to ask, send us a message, or request a feature.