 Cropped
Help
Cropped
Help
Help / How to
Resize one image for every social media size
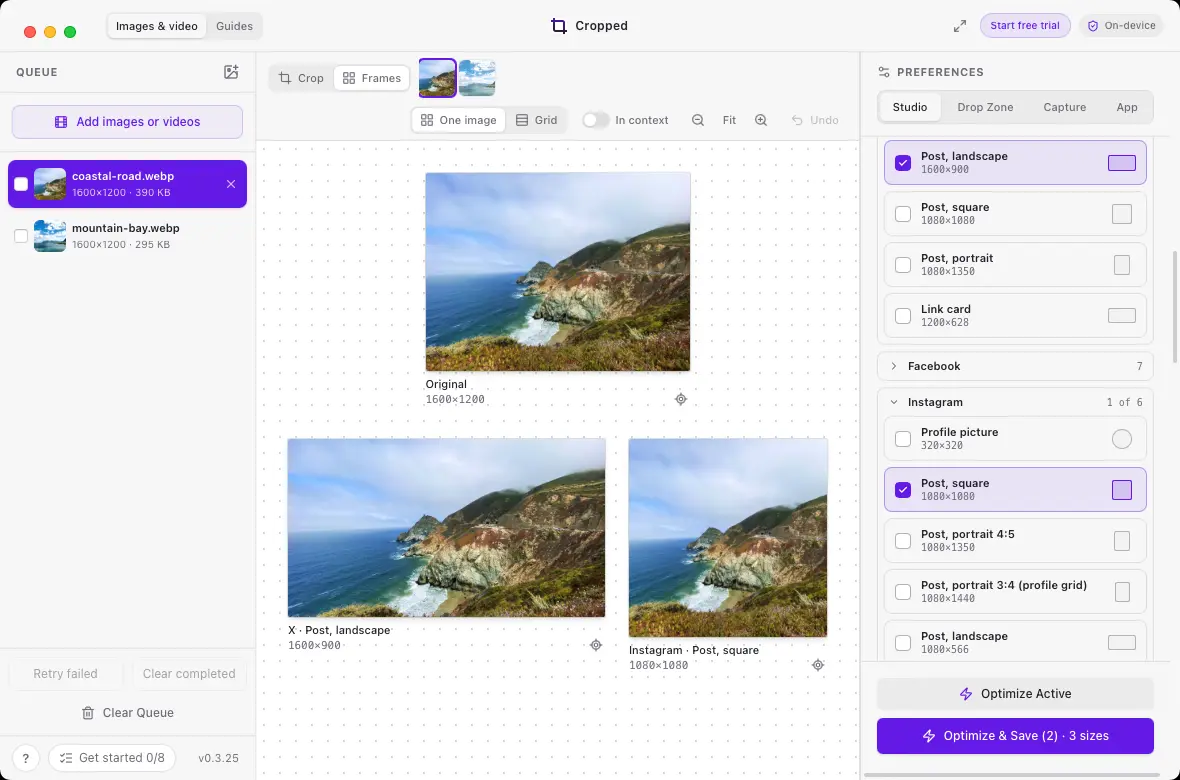
The short answer: open the image in Cropped, tick the sizes you need under Export sizes, check them side by side in Frames, and click Optimize & Save. You get one correctly sized file per network, all from one image.
Steps
- Drop the image on the Studio, or press ⌘ Command + O (Windows and Linux: Ctrl + O).
- Under Export sizes, tick each size, such as Instagram portrait 4:5, X post, LinkedIn post, YouTube thumbnail or a Story. There are 51 built-in platform sizes.
- Switch to Frames to see them all at once. Drag inside any frame to move the picture, or drag a corner to zoom. Each size keeps its own framing.
- Turn on In context to check each size inside a simple mock of the feed, Story or header.
- Click Optimize & Save. Files are named after the size, such as photo-cropped-x-header-1500x500.webp.
If you export WebP or AVIF, each size also gets a PNG or JPG copy, because most networks won't take WebP or AVIF uploads.
Save the set for next time
Group the sizes you always use into a collection, and share it by link with your team. See Crop images and export social media sizes and the full social media image sizes list.
Still stuck? Click the ? button at the bottom left of the Cropped Studio to ask, send us a message, or request a feature.