 Cropped
Help
Cropped
Help
Help / Capture & annotate
Annotate screenshots
Point things out, explain a bug or hide a password before you share. The Annotate window opens on top of everything and saves a new screenshot, so the original stays as it was.
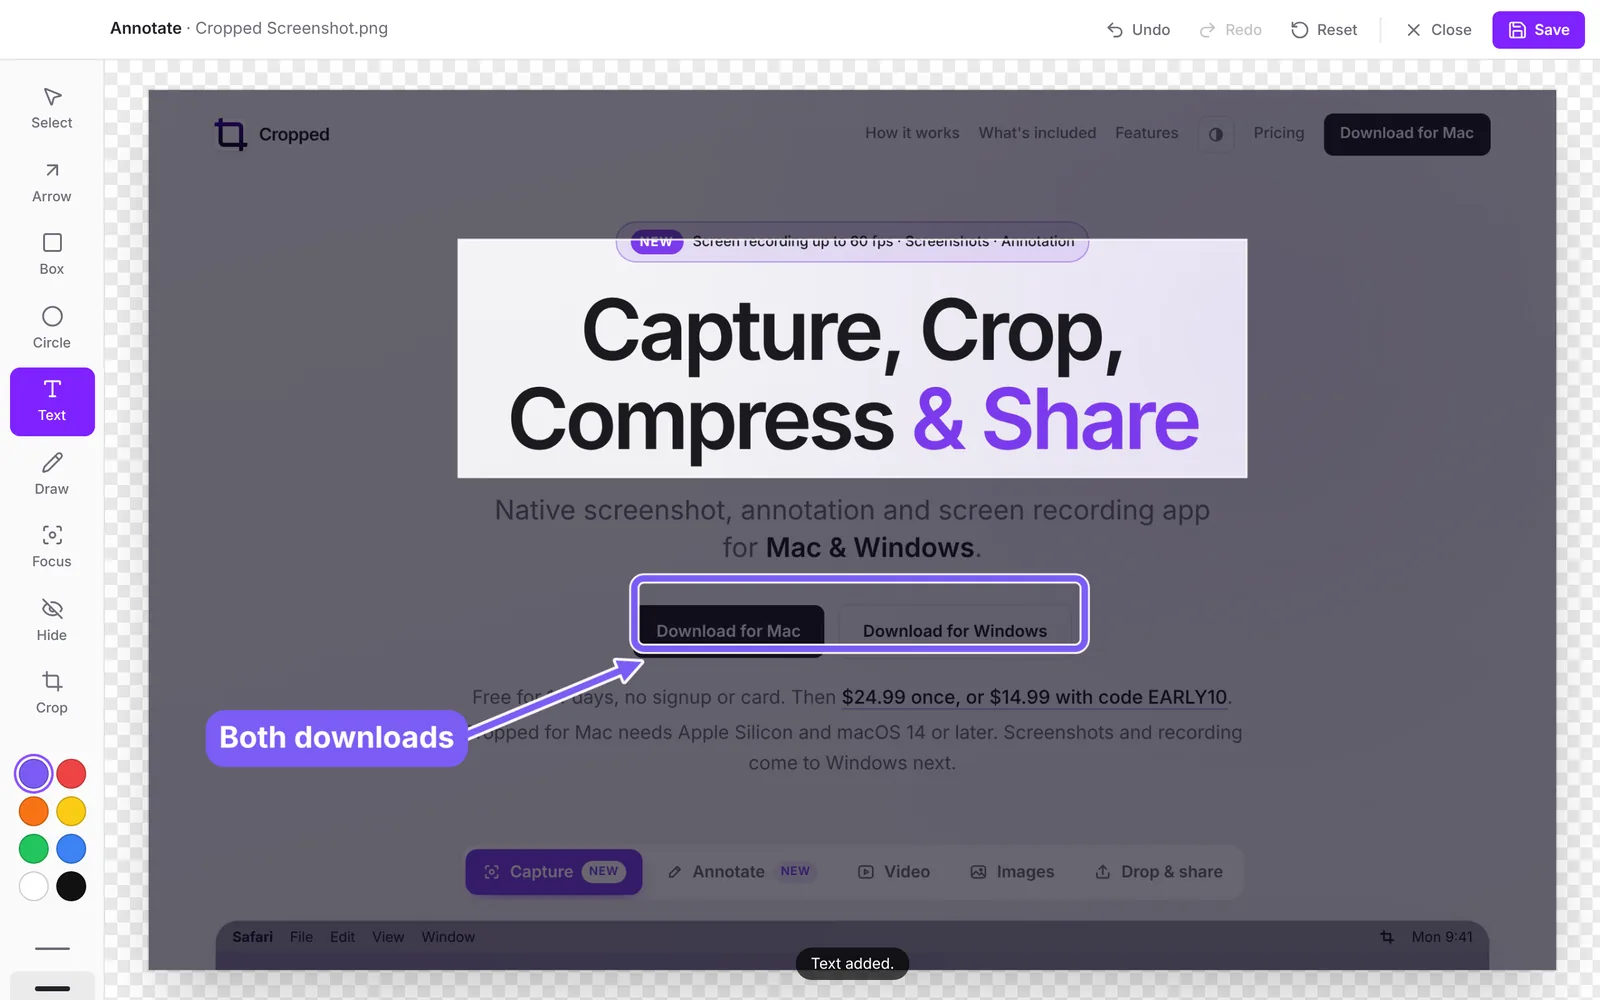
Open the Annotate window
Click any screenshot in the Drop Zone, or click Annotate on its card. The window title shows the file name.
Tools
Pick a tool from the left column or press its letter key.
| Tool | Key | How to use it |
|---|---|---|
| Select | V | Drag a mark to move it, drag its handles to resize it. Delete removes it. |
| Arrow | A | Drag from where the arrow starts to what it points at. |
| Box | R | Drag to draw a rectangle. Hold Shift for a square. |
| Circle | O | Drag to draw an oval. Hold Shift for a perfect circle. |
| Text | T | Click where the text goes, type, then press Return. |
| Draw | D | Draw freehand. |
| Focus | F | Drag around what matters. Everything else is dimmed. |
| Hide | H | Drag over private details to cover them with solid black. |
| Crop | C | Drag over the part of the screenshot to keep. |
Arrow is selected when the window opens.
Hide passwords and private details
Pick Hide (H) and drag over anything you don't want to share, such as a password, an email address, a card number or a customer's name. Cropped covers it with solid black, so the hidden text can't be read or recovered from the saved file, unlike a blur.
To draw attention instead of hiding, use Focus (F): drag around what matters and everything else is dimmed.
Color, size and text style
- Colors: Cropped violet, red, orange, yellow, green, blue, white and black.
- Size: Small, Medium or Large. It sets the line width and text size.
- Text style (Text tool): Label puts white text on a colored tag. Plain draws colored text with an outline, which reads well on any background.
Change the color or size while a mark is selected to restyle that mark.
Edit marks
- Move or resize any mark by grabbing its outline, in any tool. You don't have to switch to Select first.
- A new mark stays selected with its handles showing, so you can adjust it right away.
- Double-click text to edit it. Shift + Return starts a new line, and Esc cancels.
- Delete or Backspace removes the selected mark. Esc deselects it.
- Crop can be undone like any mark. Undo brings the rest of the screenshot back.
- Reset removes every mark and crop. Undo brings them back.
Save and share
Click Save (⌘ Command + S or ⌘ Command + ↩ Return; Windows Ctrl + S). Cropped saves the result as a new screenshot named like "Cropped Screenshot … edited.png", then optimizes and copies it like any capture. It appears in the Drop Zone, ready to drag into an app.
Close the window with ⌘ Command + W (Windows: Ctrl + W) to leave without saving.
Keyboard shortcuts in the Annotate window
| Action | Mac | Windows |
|---|---|---|
| Undo | ⌘ Command + Z | Ctrl + Z |
| Redo | ⇧ Shift + ⌘ Command + Z or ⌘ Command + Y | Ctrl + Shift + Z or Ctrl + Y |
| Save | ⌘ Command + S or ⌘ Command + ↩ Return | Ctrl + S or Ctrl + Enter |
| Close without saving | ⌘ Command + W | Ctrl + W |
| Delete selected mark | Delete | Delete |
| Deselect | Esc | Esc |
| Switch tool | V A R O T D F H C | Same |
Still stuck? Click the ? button at the bottom left of the Cropped Studio to ask, send us a message, or request a feature.