 Cropped
Help
Cropped
Help
Help / Capture & annotate
Use Cropped with Claude, Cursor and Codex
Cropped can work for your AI app. Once they're connected, Claude Code, Claude Desktop, Cursor or Codex can ask Cropped to take a screenshot, draw on it, crop and resize it, fit it to social media sizes, make a new image with your own API key, look through a screen recording, edit videos together with music and voiceover, or shrink an image or video, all on your computer.
Pictures go back to the AI with the Agent / LLM preset (WebP, half size, at most 1280 pixels wide), so each screenshot uses a fraction of the image tokens a full-size Retina screenshot would.
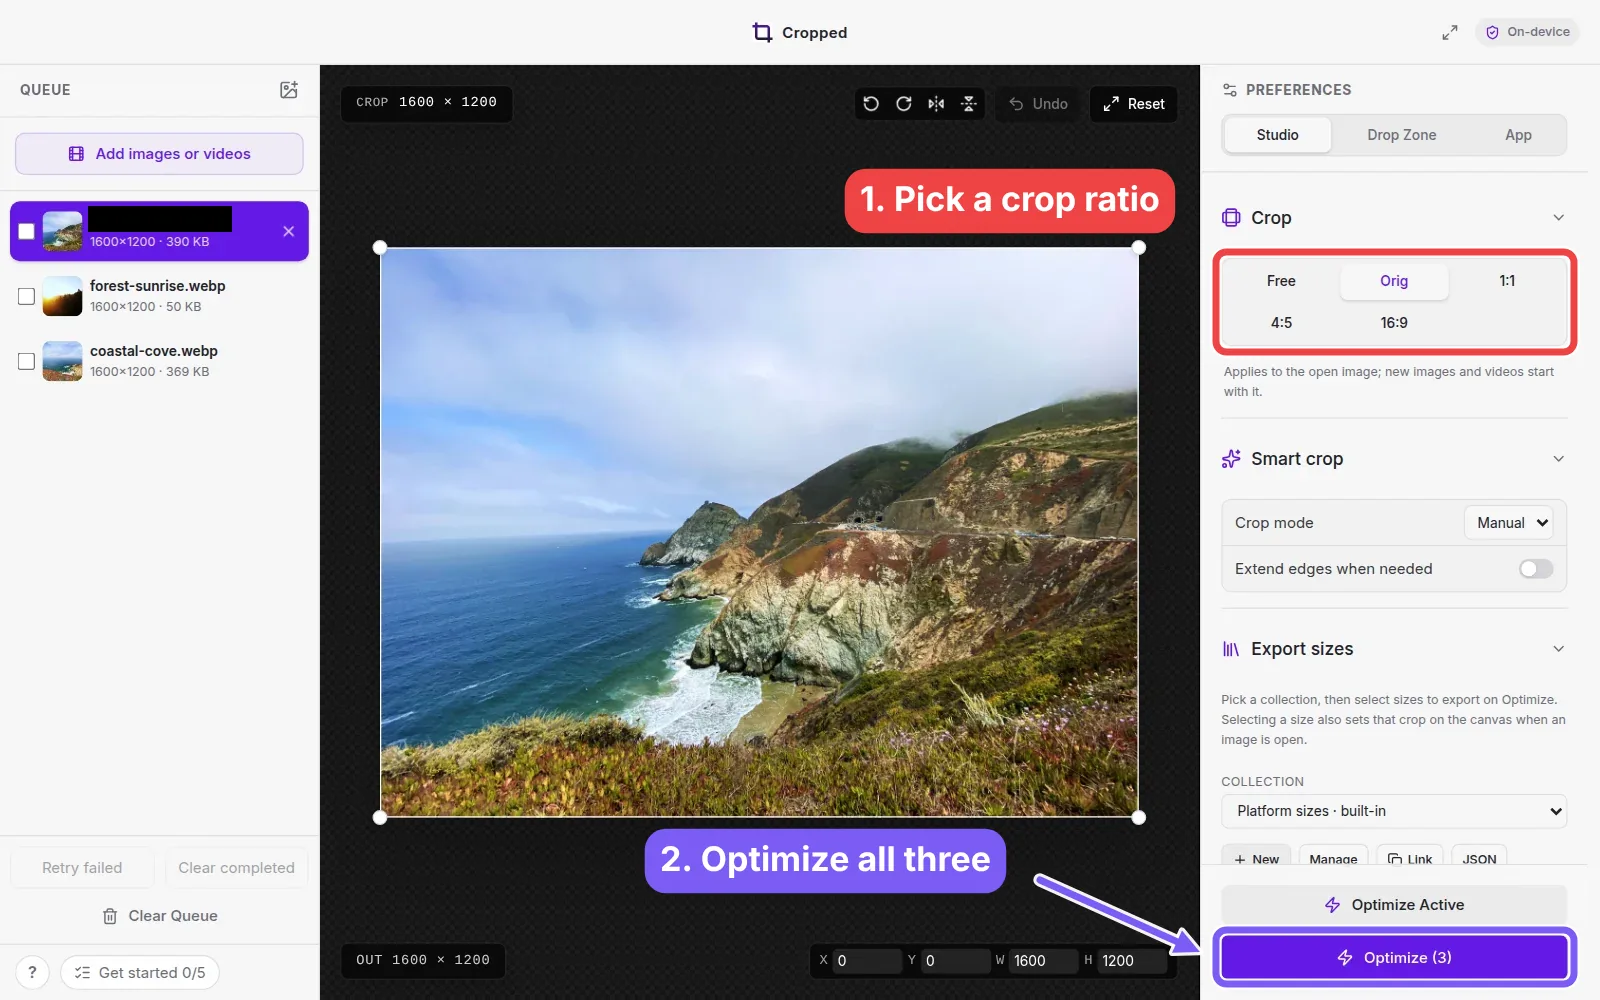
It uses MCP, the standard way AI apps connect to tools. You don't need an API key or another subscription: it uses the AI app and plan you already have. The one exception is making brand-new images, which uses your own image key (see Make new images).
You don't need to learn the tools below. Ask in your own words, and your AI picks the right tool and fills in the details. This page lists them so you know what's possible and what to ask for.
Connect your AI app
Open Preferences, click App, and scroll to AI tools.
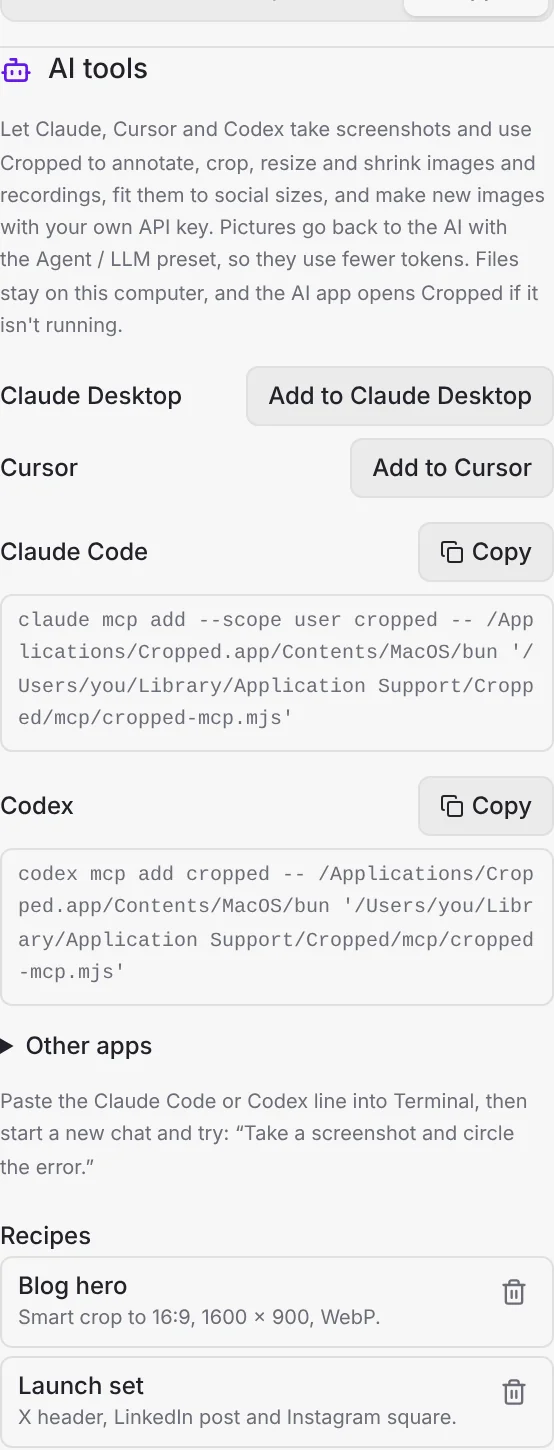
Claude Desktop
Click Add to Claude Desktop, then quit Claude Desktop completely (Claude › Quit Claude on a Mac, or from the system tray on Windows) and open it again. Cropped adds itself to Claude's settings file and leaves everything else in it as it was.
Claude Desktop isn't available for Linux, so on Linux this button isn't shown. Use Claude Code, Cursor or Codex there.
Cursor
Click Add to Cursor. Cursor opens and asks you to confirm adding the Cropped server. Then open a new chat in Agent mode.
Claude Code
Click Copy next to Claude Code, paste the line into Terminal (or PowerShell on Windows) and press Return. It looks like this:
claude mcp add --scope user cropped -- …
--scope user makes Cropped available in every project, not just the folder you're in. Start a new Claude Code session afterwards; /mcp lists Cropped when it's connected.
Codex
Click Copy next to Codex, paste the line into Terminal and press Return. It runs codex mcp add cropped -- …. Start a new Codex session afterwards.
Other apps
Any app that supports MCP servers can use Cropped. Open Other apps and copy the MCP settings (JSON) into that app's MCP settings. It's the standard mcpServers entry that names the program to run.
Alpha and release side by side
The released Cropped connects under the name cropped. A Cropped Alpha build connects as cropped-alpha, so you can connect both and pick which one your AI uses. In your AI app's tools list, the Alpha's tools show under cropped-alpha. If you only test the Alpha now and then, you can leave both connected.
First use
Start a new chat after connecting. Your AI app may ask you to allow Cropped the first time it uses each tool; allow it once or always, as you prefer.
Cropped doesn't have to be open: the AI app opens it in the background when it needs it.
What to ask
- “Take a screenshot of the window I pick and tell me what's wrong.”
- “Look at my last screenshot and circle the error.”
- “Take a screenshot and hide the email addresses before you share it.”
- “Shrink every PNG in the docs folder with the Web preset.”
- “Look at my latest recording, then trim it to the part where I open Settings, without the sound.”
- “Make this photo into an X header, a LinkedIn post and a story.”
- “Make a 30-second vertical demo from my last two recordings: the title image first, the parts where I open Settings and export, then song.mp3 underneath.”
- “Crop my last screenshot to the Settings window, make it 1200 wide and save it as WebP.”
- “Make a 16:9 hero image of a calm lake at dawn for my blog.” (needs your own API key)
- “Save that as a recipe called Blog hero.” Later: “Run Blog hero on every PNG in this folder.”
When the AI takes a screenshot, Cropped shows its usual area picker and you choose what to capture, so the AI never sees your screen without you.
All the tools
Cropped gives your AI 15 tools. Each name below is what you'll see in your AI app when it asks to use one.
| Tool | Name in your AI app | What it does |
|---|---|---|
| Take a screenshot | take_screenshot | You pick an area or window, or Cropped captures the whole screen. |
| Get a capture | get_capture | Your newest screenshot, or one from your history. |
| List captures | list_captures | Your recent screenshots and recordings. |
| List presets | list_presets | Your image and video presets, by name. |
| Annotate an image | annotate_image | Boxes, circles, arrows, labels, highlights and hidden areas. |
| Optimize an image | optimize_image | Shrinks an image with one of your presets. |
| Edit an image | edit_image | Crops, resizes, fits to sizes, rotates, flips, pads and annotates, in any order. |
| List sizes | list_sizes | Social media sizes and your own size collections. |
| Generate an image | generate_image | Makes a new image with your own OpenAI or Gemini key. |
| Look at a video | video_frames | A few stills from across a recording. |
| Optimize a video | optimize_video | Shrinks a video, and can trim it and remove the sound. |
| Edit a video | edit_video | Joins videos, images, music and voiceover into one video. |
| List recipes | list_recipes | Your saved edits. |
| Save a recipe | save_recipe | Saves an edit under a name. |
| Delete a recipe | delete_recipe | Deletes a saved edit. |
Saved files go to your Drop Zone folder with your usual file names, and they appear in the Drop Zone so you can drag them anywhere. Unless you name a preset, images use your Drop Zone image preset and videos your Drop Zone video preset.
Screenshots and your capture history
Take a screenshot shows Cropped's own capture tools. The AI can ask for an area (you drag), a window (you click one) or the whole screen (captured at once). It waits while you choose, and gets nothing if you press Esc. The screenshot is saved to your history as usual, and the AI gets a small copy plus an id it can use with the other tools.
Get a capture fetches your newest screenshot, or a specific one by id, so you can take a screenshot yourself and then say “look at my last screenshot.” For a recording it returns the details; the AI then uses Look at a video to see inside.
List captures gives the AI your recent screenshots and recordings (10 by default, up to 50), newest first, with sizes and file paths.
Try:
- “Take a screenshot of the window I click and check the spacing.”
- “What's in my last three screenshots?”
Annotate and optimize images
Annotate an image draws in the same style as Cropped's annotation editor:
| Shape | What it's for |
|---|---|
| Box | Outline an area. |
| Circle | Ring something small, like a button. |
| Arrow | Point from one place to another. |
| Text | A label, on its own or with a box, circle or arrow. |
| Highlight | Dims everything else so one area stands out. |
| Hide | A solid block over emails, keys, names or anything private. |
Colors are red (the default), orange, yellow, green, blue, violet, white and black, or any hex color. Lines and text come in small, medium or large. It can also crop the picture to the part that matters. The AI measures on the small copy it was shown, and Cropped places everything on the full-size original, so nothing comes out blurry.
Optimize an image shrinks any image on your computer, or a capture, with one of your image presets. Your AI can ask for a preset by name, like “Web” or “Agent / LLM”.
List presets gives the AI the names of your image and video presets, including ones you made yourself in Optimize images.
Try:
- “Circle the error in my last screenshot, add the label ‘Fails here’, and hide my email address.”
- “Shrink hero.png with my Web preset.”
Crop, resize and fit for your AI
Edit an image is the general image tool. It runs steps in the order the AI lists them:
| Step | What it does |
|---|---|
| Crop | To an area the AI picked, or to a shape like 16:9 kept around the main subject, the center or a point. |
| Resize | To a width, a height or a percentage, keeping the picture's shape. |
| Fit | To a social size from List sizes (like an X header) or any width and height. |
| Rotate | 90°, 180° or 270°. |
| Flip | Horizontally or vertically. |
| Pad | Adds a border on any or every side, in white, black, any hex color, or transparent. |
| Annotate | The same shapes as Annotate an image. |
When a fit changes the shape, the AI chooses how:
- Crop keeps the main subject and trims the rest (the default).
- Extend keeps the whole picture and fills the new edges from it, which works best for small gaps.
- Pad keeps the whole picture and fills the edges with a color.
- Stretch squeezes the picture to fit.
It can also make several files at once, one for each size you name, such as a header, a square post and a story for each of your social accounts.
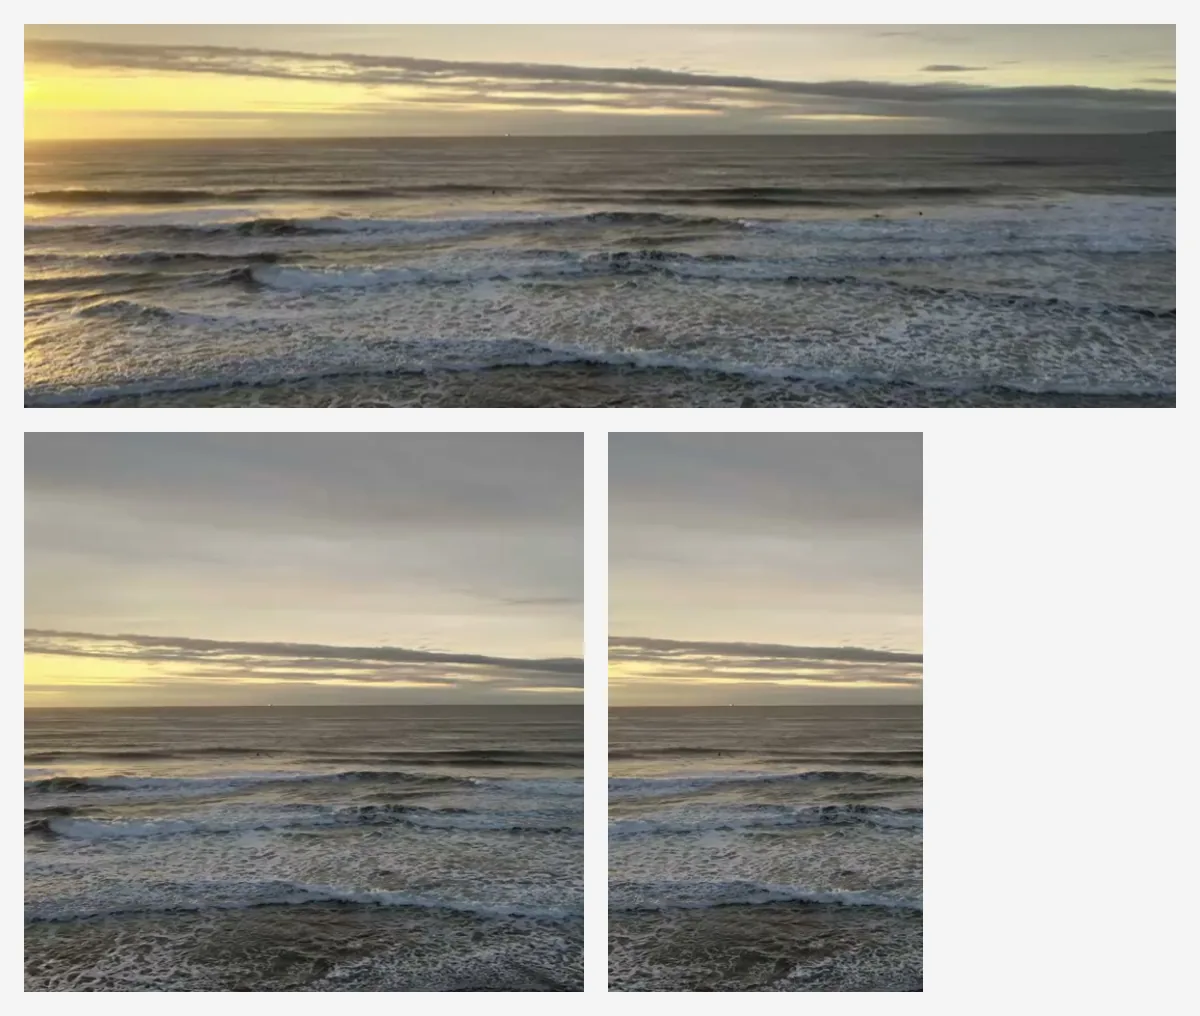
The AI can save as WebP, AVIF, JPEG or PNG and set the quality, or use one of your presets. It can preview an edit without saving anything, show you, and save once you're happy.
When a picture is too small for a size, Cropped makes the largest version it can at the right shape and tells the AI, rather than enlarging it. Ask for it to be enlarged if you want the exact pixels.
Edit an image also takes pictures from other tools: a file path, a capture, an image another AI made, or an https link to one. That way an image made elsewhere can be finished in Cropped.
List sizes gives the AI every size Cropped knows: X, Facebook, Instagram, LinkedIn, YouTube, Pinterest, TikTok and more, plus your own size collections. That's why “a LinkedIn banner” just works.
Try:
- “Make my last screenshot 1600 wide, add a 40 pixel white border and save it as PNG.”
- “Fit logo.png into a 1200 × 630 link preview, padded with white.”
- “Turn photo.jpg into every Instagram size, keeping my face in frame. Show me before saving.”
Make new images
Generate an image makes a new image from a description with your own API key. Add an OpenAI key, or a Gemini key under Image model key, in Preferences › App › API keys. You can also use any provider that works like OpenAI by entering its address. Each image is billed to you by that provider, and Cropped sends the description, and any pictures you ask it to use, straight to that provider from your computer.
| Shape | Any shape, like 16:9 or 1:1. The model makes its nearest supported shape, and Cropped then crops or fits it exactly. |
| Reference images | Up to 4 of your files or captures, to edit or to copy the style of. |
| Model | OpenAI uses gpt-image-1 and Gemini uses gemini-2.5-flash-image, unless you ask for another model. |
| Sizes | The same steps and outputs as Edit an image, so one request can make an image and fit it to every size you need. |
Image models draw words poorly, so ask your AI to add titles and labels afterwards as annotations.
Try:
- “Make a 16:9 hero image of a calm lake at dawn, then give me the X header and LinkedIn post sizes.”
- “Use my last screenshot as a reference and make a clean illustrated version of it.”
Look at and shrink videos
Look at a video gives the AI small stills spread across a recording (6 by default, up to 12), each with its time. It can also look closely at just one part. That's how the AI finds where something happens before it trims or edits.
Optimize a video shrinks a video or recording with one of your video presets. It can keep just the part between two times and remove the sound. The original isn't changed.
Try:
- “Look at my latest recording and tell me when the error appears.”
- “Keep 0:12 to 0:40 of demo.mov, without sound, as an MP4 for the web.”
Edit videos by asking
Edit a video puts one video together from parts of videos and screen recordings, still images, background music and voiceover recordings. It's the same engine as a sequence in the Studio, without opening the editor. Your AI usually looks at the recordings first to find the parts worth keeping, then sends Cropped the whole edit at once.
| Part of the edit | What your AI can set |
|---|---|
| Clips | Videos, recordings or images, in playing order (up to 200). The same video can appear more than once, so the AI can leave out a part by keeping what comes before and after it. |
| Clip range | For a video, where the kept part starts and ends. |
| Images | Shown as stills, for 3 seconds unless the AI picks another length (0.2 seconds to 10 minutes). |
| Clip sound | Each clip's own volume, from silent to twice as loud, or muted. |
| Music | One audio file (M4A, MP3, WAV, AAC, AIFF, FLAC, OGG or Opus) under the whole video. It plays at 35% volume, loops if it's shorter than the video, fades in and out over 2 seconds, and gets quieter while a clip or voiceover has sound. Each of these can be changed. |
| Voiceover | Up to 50 audio files, each placed at a time in the finished video, optionally starting part way into the file, with its own volume. A voiceover is cut off where the video ends. |
| Shape | Original, 16:9, 9:16 (Reels, Shorts and TikTok), 1:1 or 4:5. |
| Preset | Which of your video presets to save with. |
| Sound | The whole video can be made silent. |
The first video in the edit sets the frame size, and images and other videos fit inside it. An edit needs at least one video; images and audio alone can't make one. Cropped checks every file before it starts, and tells the AI clearly if a time is past the end of a video or a file is missing.
To record a voiceover with your microphone, use the Studio's voiceover lane. Your AI can then use that recording, or any other audio file.
The finished video is saved with your Drop Zone video preset, or the one you name, to your Drop Zone folder. The AI gets back its size and length.
Try:
- “Make a 30-second vertical demo from my last two recordings: the title image for 2 seconds, the parts where I open Settings and export, then song.mp3 underneath.”
- “Join intro.mov, demo.mov and outro.png into one 16:9 video, and mute the demo's own sound.”
- “Put voiceover.m4a over my latest recording starting at 5 seconds, with music.mp3 quietly underneath.”
- “Leave out the part of demo.mov from 1:10 to 1:45 where I wait for the upload.”
Recipes
When you like an edit, ask your AI to save it as a recipe, like “Blog hero: crop to 16:9, 1600 × 900, WebP.” A recipe keeps the steps, the sizes to make and the format or preset. Any AI app connected to Cropped can then run it by name, with Edit an image or Generate an image, and add more steps after it.
Saving with a name that's already used replaces that recipe. List recipes shows them all, and Delete a recipe removes one. Your recipes are also listed under Recipes in Preferences › App › AI tools, where you can delete them yourself.
Try:
- “Save that as a recipe called Launch set.”
- “Run Launch set on every PNG in my screenshots folder.”
Privacy
Everything happens on your computer, except making new images, which goes to the provider of the key you added. Cropped only answers AI apps on this computer that you've connected with the steps above: it doesn't open anything to the internet, it needs a key file only your user account can read, and web pages can't reach it.
Your AI app sends what it receives from Cropped to its AI service, as it does with anything you paste into a chat. That includes the screenshots and video stills you let it take or read. Files you edit are never sent anywhere: only the small copies the AI looks at.
License
The AI tools work during the free trial and with a lifetime license. When the trial has ended, Cropped tells the AI that it needs a license, and you can buy one to continue.
Troubleshooting
- New tools don't show up after updating Cropped: quit and reopen your AI app (Claude Desktop, Cursor or Codex), or start a new Claude Code session. AI apps read the list of tools when they start, so they only see tools added in an update after a restart.
- Claude Desktop doesn't list Cropped: quit Claude Desktop completely, not just its window, and reopen it after clicking Add to Claude Desktop.
- The AI says Cropped didn't open: open Cropped yourself, then ask again.
- Claude Code or Codex says the command isn't found: install that app's command line tool first, then paste the line again.
- You see two Croppeds in your AI app: one is the Alpha (cropped-alpha) and one is the release (cropped). Remove the one you don't use in that app's MCP settings.
- The AI says no image key is set: add an OpenAI or Gemini key in Preferences › App › API keys.
- A size came out smaller than asked: the picture was smaller than that size. Ask the AI to enlarge it, or start from a bigger picture.
- A video edit fails with a time past the end: the AI asked for more than the file has. Ask it to look at the video again and pick new times.
- The AI says it needs a license: start the trial or activate your license in Preferences › App.
- Moved Cropped to another folder: copy the line again or click the button again, because the setup points at where Cropped is installed.
Still stuck? Click the ? button at the bottom left of the Cropped Studio to ask, send us a message, or request a feature.