 Cropped
Help
Cropped
Help
Help / Crop, optimize & export
Remove the background from an image
Cropped finds the subject of a picture and removes everything else, in one click. It runs on your computer and works offline, so your pictures are never uploaded.
Quick answer: open the image in the Studio, click Remove background under Background, then click Optimize & Save. Save as PNG, WebP or AVIF to keep the background see-through, or pick a colour to put behind the subject.
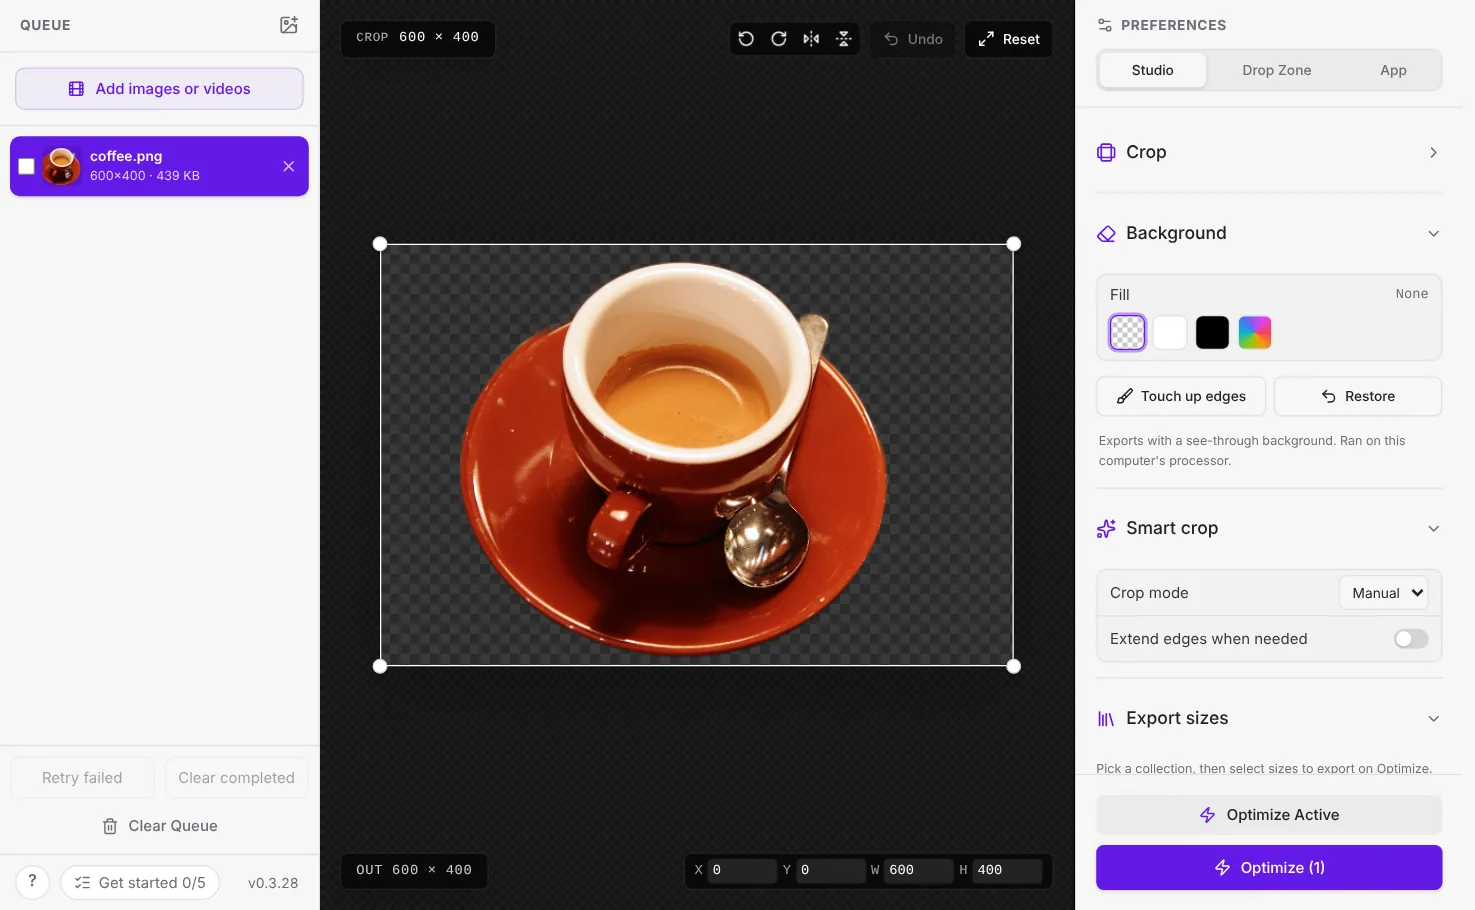
Remove a background
- Open an image in the Studio.
- Under Background in Preferences, click Remove background.
- Cropped finds the subject and shows the result in the editor. The checkerboard marks the parts that will be see-through.
The first time, Cropped takes a few extra seconds to load its background model. After that it's ready until you close the Studio. On computers whose graphics card the app can use, it takes about a second; otherwise it runs on the processor and takes a little longer.
To remove the backgrounds from several images at once, tick them in the queue and click Remove from N selected images.
Crop, rotate, flip and export sizes all work as usual afterward. The background stays removed for every size you export.
Choose what goes behind the subject
Under Fill, pick:
- None (the checkerboard) to keep the background see-through.
- White or Black.
- The rainbow swatch to choose any colour.
PNG, WebP and AVIF keep a see-through background. JPEG can't, so Cropped saves the background as white unless you pick a fill; click Use PNG in the note to switch formats. See Optimize images for formats.
Touch up the edges
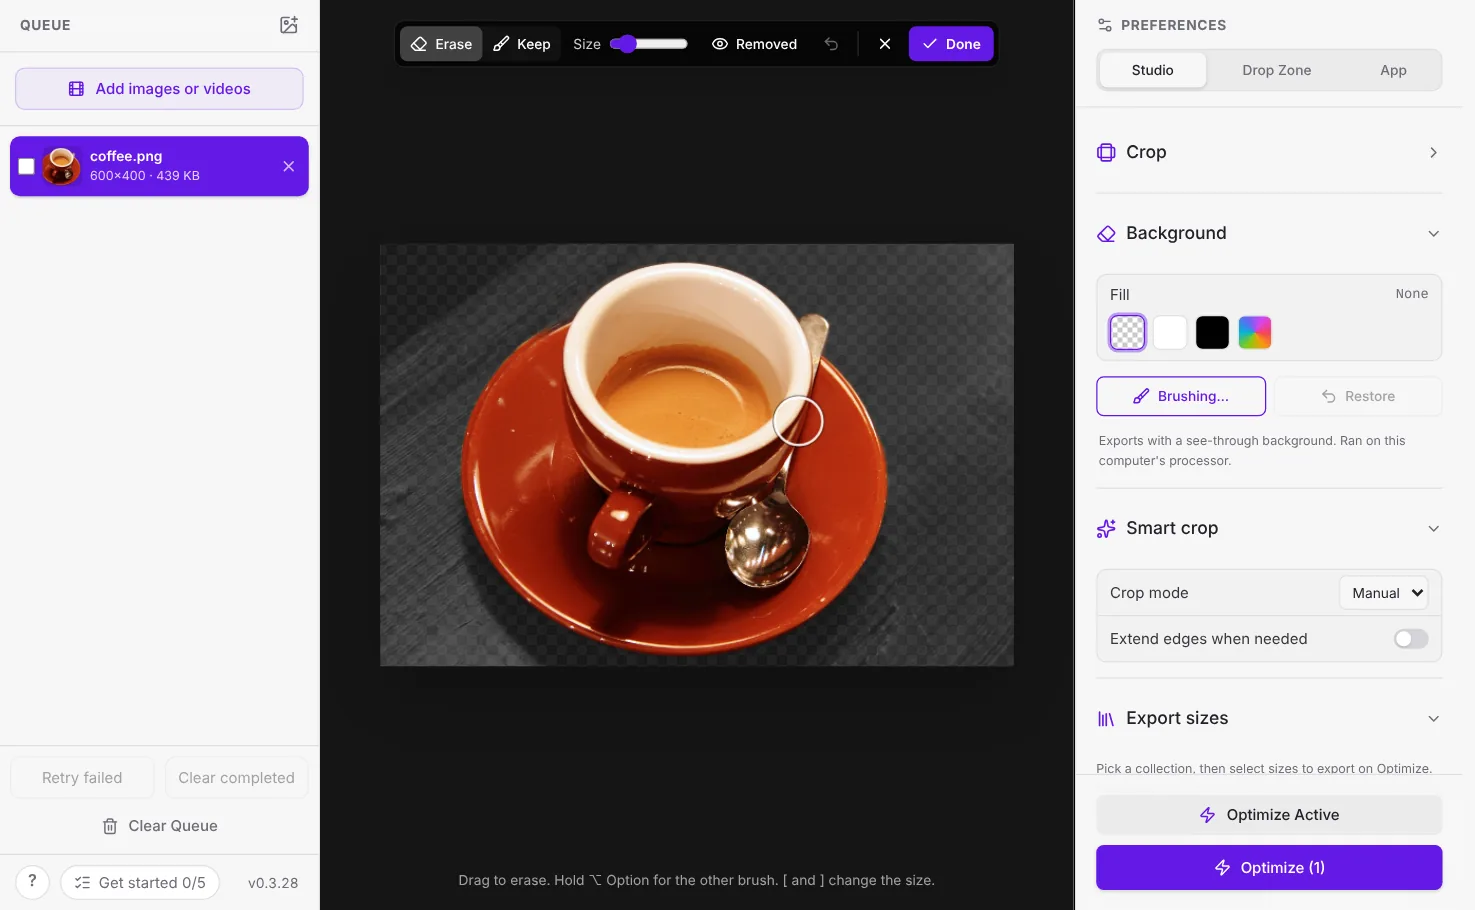
If the outline missed a strand of hair or kept a bit of the table, click Touch up edges and paint over the picture:
- Erase (E) clears what shouldn't be there.
- Keep (K) brings back parts of the subject.
- Hold ⌥ Option (Windows and Linux: Alt) to use the other brush while you hold it, or press X to swap.
- [ and ] make the brush smaller or bigger.
- ⌘ Command + Z (Windows and Linux: Ctrl + Z) undoes the last stroke.
- Removed shows the removed parts faintly in grey, so you can see what Keep can bring back.
Click Done (Return, Windows and Linux Enter) to keep your touch-ups, or × (Esc) to leave without them.
Put the background back
Click Restore under Background. The original picture comes back, with your crop and rotation kept.
Good to know
- Your original file is never changed. The background is removed in the copy Cropped saves.
- It works best when the subject stands out from its background: people, pets, products, logos and objects. Busy scenes with no clear subject may need some touching up.
- Cropped uses IS-Net, an open background removal model (Apache License 2.0), and runs it inside the app. No account, API key or internet connection is needed.
- It works the same on Mac, Windows and Linux.
Still stuck? Click the ? button at the bottom left of the Cropped Studio to ask, send us a message, or request a feature.