 Cropped
Help
Cropped
Help
Help / Drop Zone
The Drop Zone
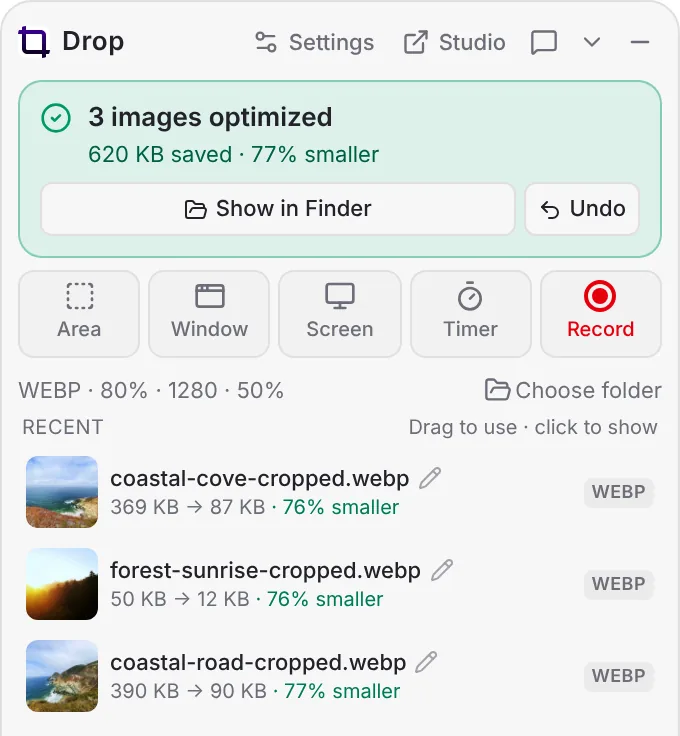
The Drop Zone is a small panel that floats above your other apps. Drop files on it and Cropped optimizes and saves them in one step, with no settings to pick. It's also where your screenshots and recordings land. Older versions of Cropped call it the Drop window.
Show, hide and move it
- The Drop Zone opens with Cropped and stays on top of other windows, on every desktop Space.
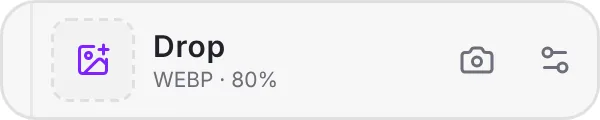
- When you're not using it, it shrinks to a small bar. Hover or drop on it to expand it again.
- Drag the grip on its left edge to move it. Drag the bottom right corner to resize the expanded window.
- The chevron button shrinks it to the bar, and the minus button hides it. Studio in its header opens the Studio.
- The small bar keeps three buttons: the camera captures an area, Undo moves your last saved file to the Trash, and the gear opens the settings.
- To bring it back, choose Window › Show or Hide Drop Zone, press ⇧ Shift + ⌘ Command + D in the Studio (Windows: Ctrl + Shift + D), or click Show Drop Zone in Preferences.
Optimize files by dropping them
- Drag images, videos or whole folders onto the Drop Zone.
- Cropped optimizes them one at a time and shows progress, such as "Optimizing 2 of 5".
- A green card shows what you saved, such as "1.2 MB saved · 97% smaller".
You can also paste an image with ⌘ Command + V (Windows: Ctrl + V) while the Drop Zone is active.
Results are saved to Downloads/Cropped and, by default, shown in Finder. Your originals are never touched.
Use the results
- Drag the green card into any app or folder to move all the saved files there (Mac). On Windows, drag files one at a time from Recent.
- Show in Finder (Windows: Show in Explorer) opens the folder.
- The last image is also copied to your clipboard when Copy result to clipboard is on.
- Recent lists your last 24 results with their savings. Click one to show it, or drag it into an app.
Undo a drop
Click Undo, or press ⌘ Command + Z (Windows: Ctrl + Z) in the Drop Zone. The files from the last drop move to the Trash (Windows: Recycle Bin), so you can still get them back.
Rename files in place
Click the pencil next to a file name, type a new name and press Return. Esc cancels. The extension stays the same. If the name is taken, Cropped adds -2.
On a new screenshot, you can rename it before its optimized copy is saved, and the name is used when the file is written.
Settings for the next drop
Click Settings at the top of the Drop Zone to change what the next drop does, without opening the Studio.
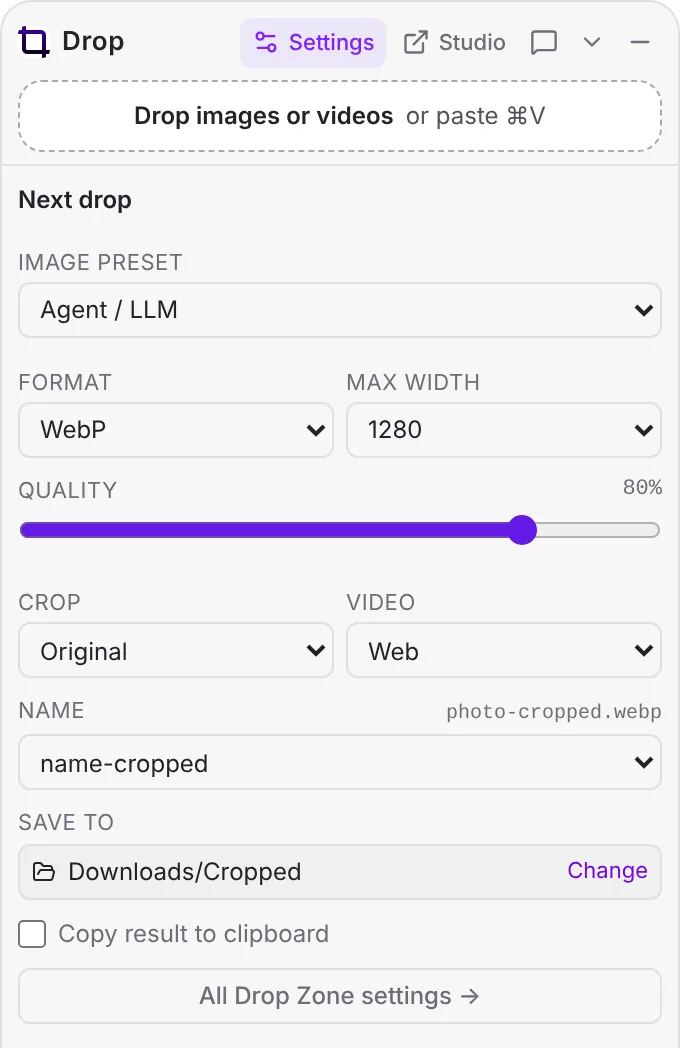
| Setting | Choices |
|---|---|
| Image preset | Any built-in or saved image preset |
| Format | WebP, AVIF, JPEG or PNG |
| Max width | Original, 3840, 2560, 1920, 1280 or 1080 px |
| Quality | 1 to 100% (not for PNG) |
| Crop | Original, 1:1, 4:5 or 16:9 |
| Video | The preset for dropped videos |
| Name | name-cropped, name-optimized, Same name or a custom ending, with a live example |
| Save to | The output folder, Downloads/Cropped by default |
| Copy result to clipboard | On or off |
The line at the bottom of the Drop Zone always shows the current settings, such as "WEBP · 80% · 1280 · 50%". All Drop Zone settings opens the full list in the Studio.
Drop Zone settings
Preferences › Drop Zone in the Studio has the rest: image preset, format, quality, max width, Scale (100%, 75%, 50%, 33% or 25%, applied after cropping), Crop, Copy result to clipboard, the video preset and file naming. The output folder is set from Save to in the Drop Zone's own settings. Editing a file in the Studio never changes these.
The default Drop Zone preset is Agent / LLM: WebP at 80%, up to 1280 px wide, then scaled to 50%. It makes screenshots small enough to paste into AI tools without wasting tokens. Pick Web if you want full-size images.
Capture from the Drop Zone
The row of buttons under the drop area takes screenshots and recordings: Area, Window, Screen, Repeat and Record. Your newest capture appears on a card below them. See Screenshots and Screen recording.
Quick trim for recordings
A new recording waits on its card with a trim bar. Drag the ends to cut the start and end, then click Trim & optimize. See Trim and optimize.
Watch a folder
Turn on Watch folder (auto-optimize) in Preferences › App and choose a folder. Every new image or video that lands there is optimized with your Drop Zone settings, as if you'd dropped it. It's useful for a camera import folder or a screenshots folder.
Report a problem
The speech bubble button at the top of the Drop Zone opens Report a bug or request a feature. You see the exact text before it's sent, and only your message, the app version and your system type are included. You can also request a feature on the website and see what others asked for.
Still stuck? Click the ? button at the bottom left of the Cropped Studio to ask, send us a message, or request a feature.