 Cropped
Help
Cropped
Help
Help / Capture & annotate
Take screenshots on Mac and Windows
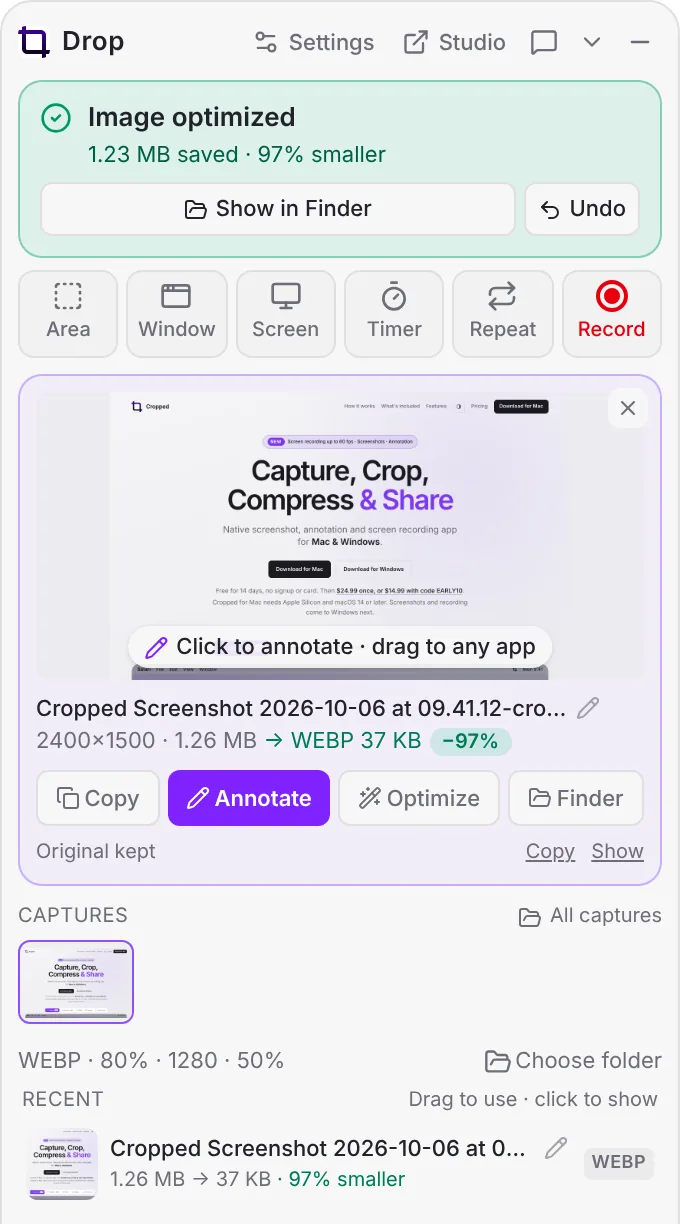
Cropped is a full screenshot tool. Grab an area, a window or the whole screen, and the result lands in the Drop Zone: already optimized, copied to your clipboard, and ready to drag into any app or to annotate.
Ways to take a screenshot
| What to capture | Mac | Windows | Drop Zone button |
|---|---|---|---|
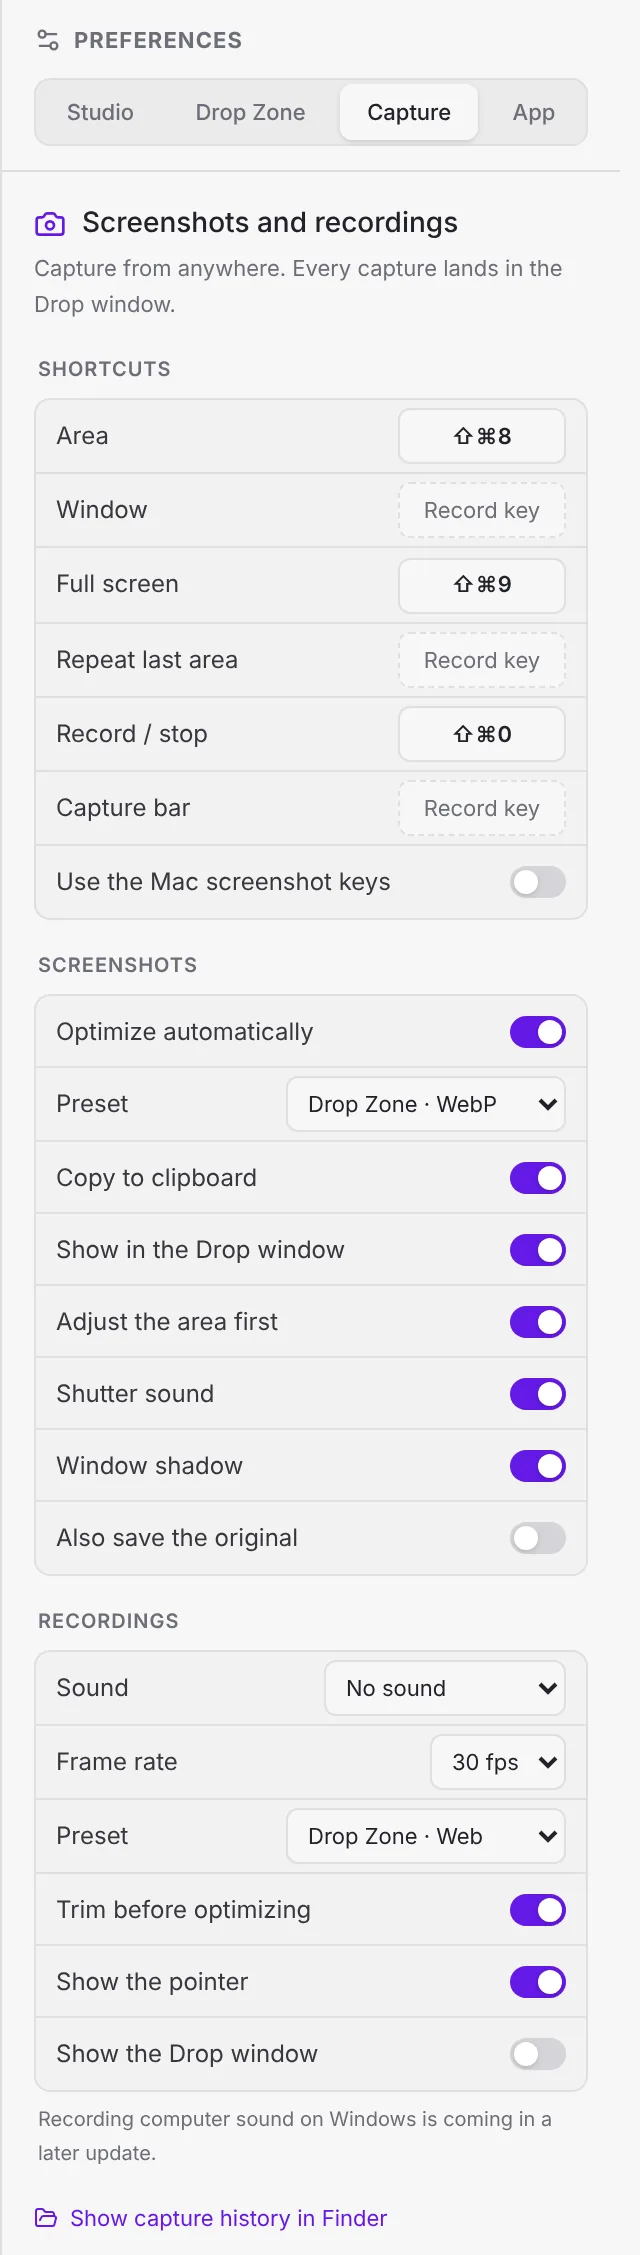
| An area you drag | ⇧ Shift + ⌘ Command + 8 | Ctrl + Shift + 8 | Area |
| The whole screen | ⇧ Shift + ⌘ Command + 9 | Ctrl + Shift + 9 | Screen |
| One window (details) | No key by default | No key by default | Window |
| The same area again | No key by default | No key by default | Repeat |
You can give any of these its own key, or use the Mac's own ⇧ Shift + ⌘ Command + 3, ⇧ Shift + ⌘ Command + 4 and ⇧ Shift + ⌘ Command + 5. See Use Cropped as your screenshot tool.
On Mac, the Capture menu in the menu bar has every option too: Capture Area, Capture Window, Capture Full Screen, Repeat Last Area, Record Screen Area, Stop Recording, Show Capture Bar, Open Captures Folder and Capture Settings.
Capture an area
- Press ⇧ Shift + ⌘ Command + 8 (Windows: Ctrl + Shift + 8) or click Area in the Drop Zone. The screen freezes so menus and tooltips stay put.
- Drag over what you want. The size in pixels follows your pointer, and a magnifier helps you line up the edges.
- Fine-tune the area: drag inside it to move it, or drag an edge or corner to resize it.
- Press Return, double-click inside the area, or click the camera button on the toolbar under the area.
Press Esc at any point to cancel, or click Cancel in the Drop Zone. The mouse pointer is never included in screenshots.
While choosing an area:
- Space switches to picking a window. Press it again to go back to dragging an area.
- Return before you drag captures the full screen (Mac).
- Arrow keys nudge the area by 1 pixel, and Shift with an arrow by 10 pixels (Mac).
- Option with an arrow resizes the area (Mac).
- A single click without dragging snaps the area to the window under the pointer (Windows).
The toolbar under the area can also start a recording of that same area. See Screen recording.
Capture a window
Click Window in the Drop Zone (or press Space while choosing an area), then click the window you want. On Mac, window captures keep their soft shadow and leave out anything covering the window. See Capture a window for the details.
Capture the whole screen
Press ⇧ Shift + ⌘ Command + 9 (Windows: Ctrl + Shift + 9) or click Screen. On Mac, click the screen you want (or press Return). On Windows with one display the capture happens right away; with more, click the screen you want.
Use the timer
On Mac, the toolbar under your area has a timer button next to Take screenshot. It shows how long it waits, for example 3s.
- Drag the area, then click the timer button.
- A countdown shows beside the area, which stays outlined. Use the wait to open a menu, hover a tooltip or start an animation: everything on screen, inside the area or outside it, keeps working.
- When it reaches zero, Cropped takes the screenshot of the live screen. Click the countdown to cancel.
To change the wait, hover the timer button and pick 3s, 5s or 10s. Cropped remembers your choice.
Repeat the last area
Repeat captures exactly the same area as your last screenshot, without dragging again. It's handy for before-and-after shots of the same spot. The button appears after your first area capture.
What happens after a capture
Out of the box, every screenshot:
- Is optimized with your Drop Zone image preset. The default, Agent / LLM, saves a WebP at 80% quality, at most 1280 pixels wide and then scaled to 50%, which is ideal for chats and AI tools. Pick another preset to keep more detail. The full-quality PNG original is always kept.
- Is copied to the clipboard, so you can paste it straight into a chat or document. When optimizing is on, the optimized file is what gets copied.
- Shows in the Drop Zone as a card with Copy, Annotate, Optimize and Finder (or Explorer) buttons. The ✕ closes the card; the capture stays in your history.
You can change each of these in Preferences › Capture › Screenshots:
| Setting | What it does | Default |
|---|---|---|
| Optimize automatically | Saves a smaller copy using the chosen Preset, or keep the Original PNG. | On |
| Copy to clipboard | Copies the result after each capture. | On |
| Show in the Drop Zone | Shows the new capture card. | On |
| Adjust the area first | Keeps the area adjustable before capturing. | On |
| Shutter sound | Plays a camera sound. | On |
| Window shadow | Keeps the shadow on window captures. Mac only; it has no effect on Windows. | On |
| Also save the original | Saves the full PNG to a folder you choose (Desktop by default). | Off |
Use a screenshot
From the capture card in the Drop Zone:
- Drag the preview into any app, folder or onto the desktop. You get the optimized file.
- Copy puts it on the clipboard again.
- Annotate (or a click on the preview) opens the Annotate window.
- Optimize runs it through the optimizer again, for example after you change the preset.
- Finder (Windows: Explorer) shows the saved file.
- Click the pencil next to the name to rename it before you share it. See Rename in place.
- Original kept links let you copy or show the full-quality PNG.
Below the card, Captures shows your last ten captures. Click one to bring its card back, or drag it out. All captures opens the capture history folder.
Where captures are saved
| What | Where |
|---|---|
| Optimized copy | Downloads/Cropped, or the Drop Zone folder you chose |
| Capture history (full-quality originals) | Mac: ~/Library/Application Support/Cropped/Captures. Windows: %APPDATA%\Cropped\Captures |
| Extra original (if turned on) | The Original folder you chose, Desktop by default |
Screenshots are named like Cropped Screenshot 2026-10-06 at 09.41.12.png, and the optimized copy adds your naming style, for example -cropped.webp. The history keeps your 100 most recent captures.
Screen Recording permission on Mac
macOS asks you to allow Cropped under System Settings › Privacy & Security › Screen & System Audio Recording the first time you capture. If Cropped shows "Cropped needs Screen Recording permission", click Open System Settings, turn Cropped on, then quit and reopen Cropped.
Still stuck? Click the ? button at the bottom left of the Cropped Studio to ask, send us a message, or request a feature.