 Cropped
Help
Cropped
Help
Help / Crop, optimize & export
What's new in Cropped 0.3.35
Cropped 0.3.35 is out for Mac, Windows and Linux. The editor upgrades below are on all three. Website capture and AI window recording are on Mac now and coming to Windows and Linux next.
At a glance
- Website capture at any breakpoint. Record desktop, tablet and mobile at your own sizes, as a paced section tour or a continuous scroll, then arrange them into one video.
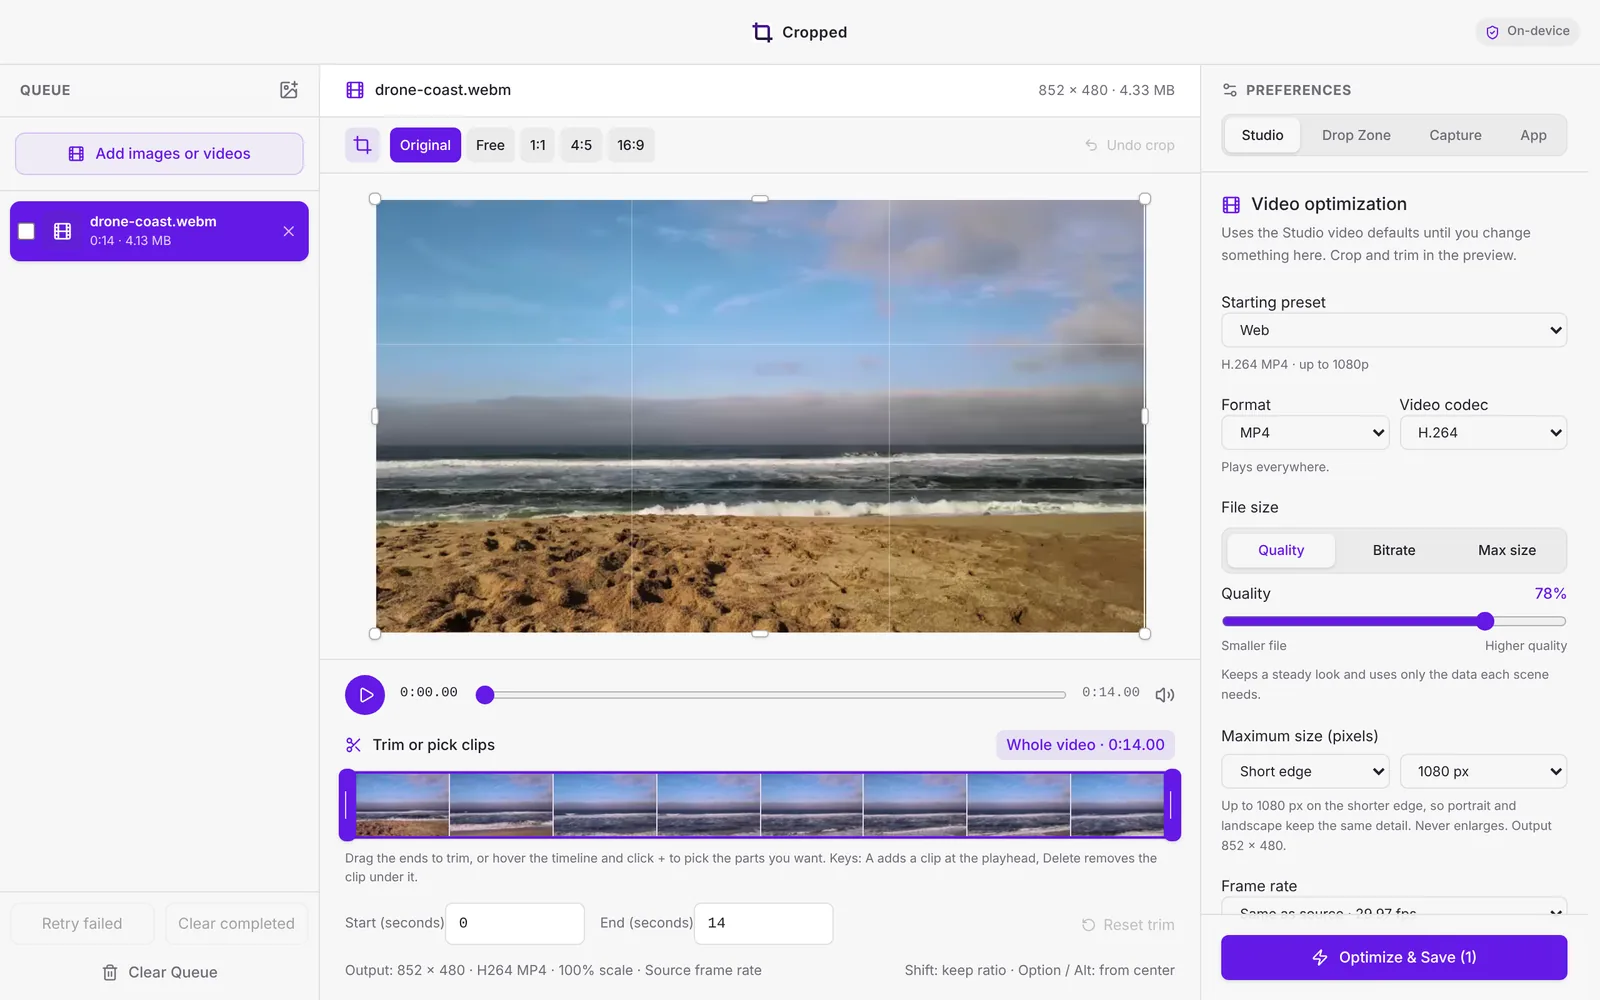
- More room for the video. The rows above and below the preview went from five to two.
- A new Layer tab. Every annotation tool sits in one grid. Styles are swatches you apply to this layer, all layers or new layers.
- Motion with every GSAP easing family, chosen by the shape of its curve.
- Text callouts that fit. Pretty line wrapping, even padding on every side, and the same result in the preview and the export.
- Timeline zoom by pinching, scrolling with ⌘ Command, or a small floating control.
- Branded, searchable dropdowns throughout the app.
- Resume editing with search, project details and your .cropped files.
- AI apps can build a walkthrough from partial layers, and on Mac record Cropped itself.
Website capture at your breakpoints (Mac)
Website capture is on Mac in this release, and coming to Windows and Linux next.
- Website in the Studio records a page at desktop, tablet and mobile sizes. Under Screen sizes · customize desktop, tablet and mobile, set each width from 320 to 2560 and each height from 400 to 1600 CSS pixels to match your site's breakpoints.
- Section tour scans each size first, finds the meaningful sections and lets you review the stops: rename them, move them, set how long to pause, add or remove stops, and set the peak scroll pace. Cropped then records a paced tour that pauses on each section.
- Continuous scroll records one smooth scroll within a maximum time of 3 to 60 seconds, with an optional high-resolution design render at 2× pixels.
- Arrange the takes in one composition: insets keep each recording's shape, can animate and can slide in from outside the canvas, with Dark browser, Light browser or Border only frames.
- Remove old captures from the list; their original recordings stay in capture history.
- Export the composition at 1440 × 900 or 2880 × 1800, at 60 or 120 FPS, or open any take in the Studio on its own.
- Use it for responsive design reviews, portfolio tours, client hand-offs, release notes, social clips and bug reports at an exact size.
Editor layout
- The project name, its length, the save state (Saved · rN), Save project, Save .cropped, Open .cropped and Recent… share one header row above the preview. Hover the name to see the full title and the video's size.
- Crop ratios and Browser frame stay in the row below the header from every tool.
- Timeline, Captions, Media and Export are tabs beside the play controls, so they no longer need their own row. The button next to them hides the dock and gives the whole height to the preview. Click it again to bring the dock back.
- The right sidebar opens at a slimmer 360 px. Drag its left edge to anywhere from 320 to 640 px; double-click the edge to reset it. Changing tabs never changes its width, and it only ever scrolls up and down.
- The queue and Preferences stay visible when you open a video.
- The playhead and timeline zoom sliders are slim, with a small purple handle.
Layer tab
- Add tools sit at the top of the Layer tab: Select, Text, Rectangle, Circle, Arrow, Cross, Number, Draw, Focus, Hide, Blur and Auto (Auto labels). The grid reflows to the sidebar's width. Undo and redo sit beside the heading.
- With nothing selected, the Layer tab still shows the tools and the style picker.
- The selected layer's name, time range and number of motion keys sit above Style, Motion and Position.
Styles and scope
- Style shows each style as a swatch: Cropped, Glass, Minimal and the styles you saved.
- Choose where a style goes, then click a swatch:
- This layer restyles the selected layer.
- All layers restyles every layer in the video.
- New layers sets the starting style for layers you add next. Existing layers are unchanged.
- Restyling is one edit. Press ⌘ Command + Z to undo it and ⇧ Shift + ⌘ Command + Z to redo it.
- Save this look as a style keeps colors, spacing and transition timing on this Mac. Hover a saved swatch and click × to remove it; layers already using it keep their look.
See Video annotations, motion and saved styles.
Motion and GSAP easing
- Entrance preset offers 12 presets: Show / hide, Fade, Slide up, Slide down, Slide in from left, Slide in from right, Pop, Zoom out, Float up, Bounce in, Elastic in and Draw on.
- Easing shows every curve family by its shape: Linear, Smooth, Power 1, Power 2, Power 3, Power 4, Sine, Expo, Circ, Back, Bounce, Elastic and Steps. Then choose In, Out or In / out (or 4, 8 or 12 steps).
- All motion runs on this Mac with GSAP's core easing. Nothing loads from the internet.
- Paused layers stay fully visible so you can edit them. Play or Preview animation shows entrances and exits.
Text callouts
- Lines wrap like CSS
text-wrap: pretty, so a callout doesn't end on a lone word. - The card hugs its text, with the same padding on every side, and the text sits centered in it.
- Drag a corner of a text card to set how wide it may grow. The height follows the text as you type or change the font size, padding or line spacing.
- Callouts fit at the final video size in the preview, in Studio exports and in exports made by AI apps, so text never clips or overflows its card.
- Double-click a callout to type on the canvas. Line height is automatic: 1 for one line, 1.3 when text wraps.
Timeline
- Zoom the timeline by pinching on the trackpad, holding ⌘ Command and scrolling, or with the small zoom control floating at the bottom right of the timeline. The moment under the pointer stays in place.
- Zoom goes from the whole video down to individual frames (up to 64×). Click the zoom amount, which reads Fit when the whole video shows, to fit it again.
- Lane names are wider, so layer names stay readable.
- Annotation layers keep their own tracks above Video, with show and hide ranges, draggable ends and keyframe diamonds.
Click zoom
- Recordings still zoom in on your clicks automatically.
- Select a zoom on the timeline to change its strength or drag its box on the picture. While you place the box, the preview shows the whole picture.
- Preview zoom plays the zoom from just before it starts.
See Zoom in on clicks.
Projects and .cropped files
- With nothing open, Resume editing lists your work. Type to search by name.
- Projects shows each project's length, clips, layers and when you last edited it. Unsaved edits appear first, ready to recover.
- .cropped shows working files you saved or opened, plus other .cropped files Spotlight finds on this Mac. A file you saved from a project reopens that project; any other file opens once as a new project.
- Open .cropped… picks a file from anywhere.
Dropdowns and keys
- Every dropdown in Cropped opens a branded list with a check on the current choice.
- Lists longer than eight options, such as presets and easing, have a search box.
- Use ↑ and ↓ to move, ↩ Return to choose and Esc to close. Typing a letter jumps to matching options.
- In the video editor, Delete only removes the selected layer, clip or zoom. With nothing selected, it does nothing.
AI apps and the Cropped MCP
website_capturerecords a website at the breakpoints and sizes you choose, andwebsite_compositionarranges and exports the takes.video_projectupdateaccepts partial layers. Send the kind, text, times and position; Cropped fills in the remaining settings from the standard new-layer defaults and assigns IDs.Text layers made by an AI app fit at the real output size when they are previewed and exported.
All 12 entrance presets and every easing curve are available to AI apps, matching the Studio.
On Mac, AI apps can record a Cropped window, mark steps, turn the recording into a walkthrough with step callouts, apply a style and export an MP4. Everything stays on this Mac.
See AI tools.
Known limits
- Draw on reveals a layer from left to right. It does not replay the pen's stroke order.
- Blur is pixelation. Use an opaque Hide layer when pixels must be covered completely.
- Joined sequences render at up to 60 frames per second.
- Website capture uses responsive viewport sizes, not phone or touch emulation. 120 FPS is a requested rate; WebKit can stay near 60 Hz.
- Double-clicking a .cropped file in Finder doesn't open it yet. Use Resume editing or Open .cropped.
Coming next for Windows and Linux
- Website capture at every breakpoint, with section tours, animated insets and 2× export.
- AI window recording, so your AI app can record Cropped and make a walkthrough on Windows too.
- Finding .cropped files across the computer works on Mac through Spotlight; Windows and Linux look in Documents, Downloads and Desktop today.
Still stuck? Click the ? button at the bottom left of the Cropped Studio to ask, send us a message, or request a feature.