 Cropped
Help
Cropped
Help
Help / How to
Crop a screenshot
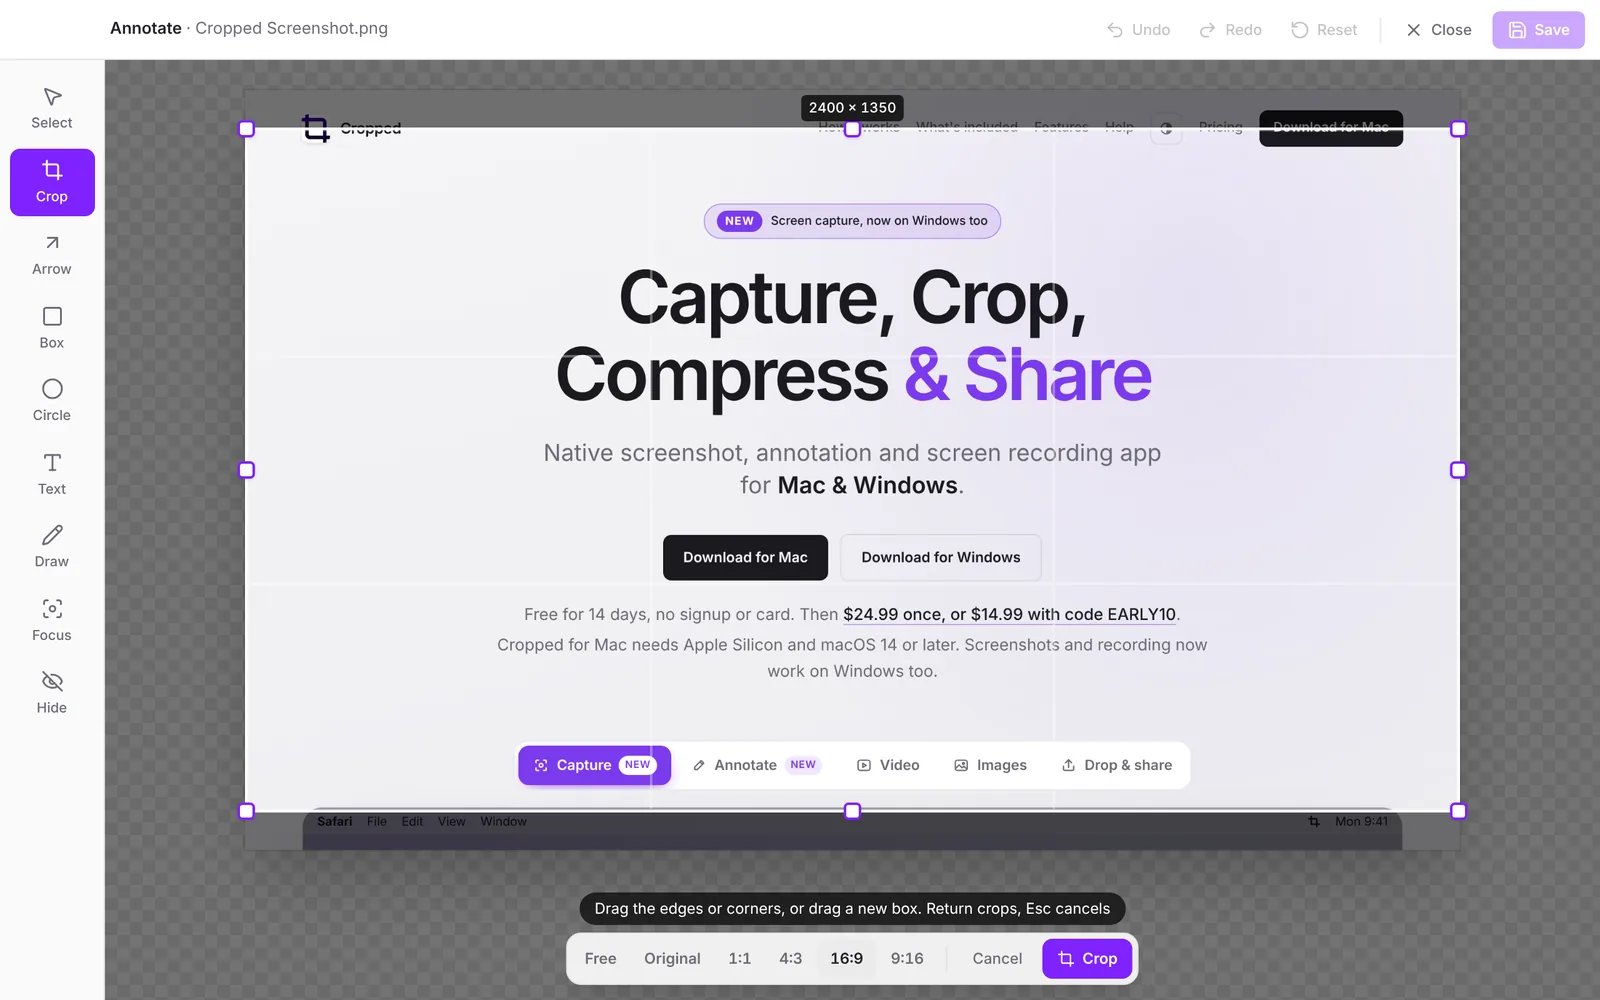
The short answer: open the screenshot in Annotate, press C for Crop, drag the edges or corners to fit, pick a shape such as 16:9 if you need one, and press Return (Windows: Enter). Click Save, and the cropped screenshot is copied to your clipboard and kept in the Drop Zone.
Skip the crop: grab just the area
Press ⇧ Shift + ⌘ Command + 8 on a Mac or Ctrl + Shift + 8 on Windows and drag over only the part you need. Smart Crop Snapping settles the selection onto visible edges, like a window, card or panel, and pink numbers help you leave the same padding on every side. See Take a screenshot.
Crop a screenshot you already have
- Click the screenshot in the Drop Zone, where Cropped's own screenshots land, or click Annotate on its card. For any other picture, open it in the Studio and click Annotate on the picture toolbar.
- Press C, or pick Crop from the tools.
- Drag the edges or corners, or drag a new box anywhere on the screenshot.
- Pick a shape from the bar below: Free, Original, 1:1, 4:3, 16:9 or 9:16.
- Press Return (Windows: Enter) or click Crop. Undo brings the rest back.
- Add arrows or a blur if you like, then click Save.
To crop a screenshot to a social media size, open it in the Studio and tick the size under Export sizes. See Crop images and export social media sizes.
Still stuck? Click the ? button at the bottom left of the Cropped Studio to ask, send us a message, or request a feature.